Process Models
About Process Models
Process Models are sequences of tasks (or steps) that are carried out to achieve a goal. The sequence of tasks, or process flow can do conditional branching based on record data.
Working with Process Models

Note: Signavio modeler is a plugin used by the AgileApps platform for modeling processes. This third-party modeling plugin will be deprecated in favour of the new Dynamic Business Orchestrator plugin (design and runtime) being built by Software AG. Users can continue to view and edit any existing processes using the Signavio modeler plugin.
Creating or Modifying a Process Model
To create or modify a Process Model:
- Create a new Process, or visit an existing process and click Open Process Model.
The editor window opens.- Important:
To edit a Process Model, use Firefox or Chrome. Other browsers may work poorly, or not all.
- Important:
- Drag process elements from the sidebar (the Palette, below) into the main panel
- Use the editor to perform other tasks (below)
- Before saving, click the Check Syntax icon to be sure the Process Model is correct:
- This is an important step.
It's possible for a flow line to look as though it goes to the right place without actually being connected to the destination icon. Performing a syntax check helps to guard against such errors. 
- This is an important step.
- Press Ctrl+S or click the disk icon (
 ) to save your changes,
or simply close the window to exit without saving changes.
- When creating a new process, you are prompted for the process name and description.
- When modifying an existing process, you are prompted for version notes.
(Version notes appear on the Process page, below the process definition.)

-
Note:
If a process model is modified while it's in use:- A process that is in progress continues to completion using the old version of the process model
- A newly-launched process use the new version of the process model
Selecting Elements
- Click on an element to select it.
- Click elsewhere on the canvas and drag the cursor to create a box (shown with a dashed outline).
When you release the cursor, everything in the box is selected. - Selected elements are shown with blue lines at the corners.
Moving Process Elements Around
- Drag elements to their approximate location. (Arrows remain connected.)
- Use the cursor keys to move the currently selected element(s) in small jumps.
- Use Ctrl+cursor keys to move the selected element(s) a minute amount.
Deleting Elements
- Use the Delete key to delete selected elements.
- Flow lines can be deleted in this manner, as well.
Process Steps and Flow Control
The Process Element Palette in the sidebar contains elements you can drag into the canvas as you define a process model. If the process is stopped in between by the Business Rules or Macros or by manual intervention, then the task created by the process is deleted and the task created is not available. If the process is restarted, new tasks will be queued and hence the old tasks are not retained when the process ends abruptly.
User Task
This is a task that will be carried out by a user.
- Instructions - Additional information that will be presented to users when the task is completed using a Form (see below)
- Due Date - Specify an interval in hours or days
- Assigned To - Identify the person who needs to perform the task (or a collection of people, one of whom needs do it):
- Team
- Identify people who can carry out the task (or do the approval) as people who are members of a designated team, people who have a designated Role, or both.
- Role - Anyone with that role can view the task and claim it. Default is Any Role.)
- Team - Any member of the team can view the task and claim it. Default is Any Team.
- Role and Team - Only members of the team who have the specified role can view the task and claim it.
- Individual - Select one of the fields that targets a User record
- Using Rule Set - Choose a Rule Set that returns a Step Owner--a value that resolves to one of the options above.
- (Click the plus icon (
) to create a new, empty Rule Set that can be filled in later.)
- Form
- Choose a Form for the object the Task is attached to, allowing the user to view and modify data in the record the task is attached to. If the process is defined on the Cases object, for example, then Case data can be modified as the Task is completed. (Typically a small form is created for the purposed, showing only the data the user needs to complete the task.)
- Comment Required? - When this box is checked, the user is required to provide a comment.
- Change Status to - This option appears for a Cases object model. Use it to automatically change case status when a task is completed.
Approval Step (Approval Task)
This task requires someone to click a button to Approve or Reject something. A Decision Switch attached to the Approval Step has an additional field, Approved, that can be tested to find out which button they clicked. (To learn more, see the description of the Decision Switch that follows. Then see Using an Approval Step, below.)
- Instructions - Additional information that is presented to users when the approval step is completed using a Form (see below)
- Due Date - Specify an interval in hours or days
- The person (or people) who can do the approval:
- Team - Identify people who can do the approval as people who are members of a designated team, people who have a designated Role, or both.
- Role - Anyone with that role can approve or reject. Default is Any Role.)
- Team - Any member of that team can approve or reject. Default is Any Team.
- Role and Team - Only members of the team who have the specified role can approve or reject.
- Individual - Select one of the fields that targets a User record
- Using Rule Set - Choose a Rule Set that returns a Step Owner--a value that resolves to one of the options above.
- (Click the plus icon (
- Form - Choose an object Form to include in the dialog when the user clicks Approve, allowing the user to view and modify data in the record the task is attached to. For a rejection, only the comment box is displayed. (Typically a small form is created for the purposed, showing only the data needed to issue an approval or a rejection.)
- Comment Required? - When this box is checked, the approver is required to provide a comment.
Send an Email
Send out an automated notification using one of the Email Templates.
- (Click the plus icon (
- Note:
Do not choose a template that includes a JSP page as an attachment.
Learn more: JSP Attachment DeprecationExecute RuleSet
Execute Rules in a Rule Set:
- Rule Set actions can carry out a number of tasks.
- They can also return a value that can be used in a Process Model#Decision Switch
- Click the plus icon (
Execute Web Service
Invoke one of the Web Services configured for the application.
- Input Mapping - Specify values used for input to the web service
- Use Object Field - Select a field from the current record
- Use Fixed Value - Type in the value to use
- Use Expression - Click in the field to bring up an expression-builder dialog:
- Click the Field link to choose a WSDL output field
- Click in the dropdown area to add an operator
- Click the Functions link to add a function
- When done, click [Insert] to add the contents of the expression builder to the expression field
- Use Variable - Select a Process Variable created by an upstream Web Service
- Specify the WSDL input field to map the data to
- Output Mapping - Map Web Service outputs storage locations
- Use WSDL Field - Select a WSDL output field
- Use Expression - Click in the field to bring up an expression-builder dialog:
- Click the Field link to choose a WSDL output field
- Click in the dropdown area to add an operator
- Click the Functions link to add a function
- When done, click [Insert] to add the contents of the expression builder to the expression field
- Specify the data storage destination:
- Use Object Field - Store the data in the current record
- Use Variable - Store the data in a Process Variable
Call Process
This option appears only in a standard process. It does not appear in a Callable Process.
- A Callable Process is a process that can be invoked as a process step.
- When you drag in this icon, you give the step a name and select the Callable Process to use.
Subprocess
- A subprocess is a container within a process that has it's own start and end, in addition to process steps and a sequence flow.
- When you create a subprocess, a large box opens up. Steps you drag into that box are part of the subprocess.
- With a subprocess, you can define a single exception-event handler, and attach it to the subprocess. Any exception that occurs in the sequence of tasks defined in the subprocess goes to that handler.
- For example, suppose that you are integrating data from several different web services. Putting all of the Execute Web Service steps in a single subprocess lets you ensure that all of the data you need is available, before proceeding with the outer process. But instead of having to define an exception handler for each Web Service, you define a single handler and attach it to the subprocess.
- In addition to record data, any Process Variables defined in the upstream process are available in the subprocess.
Decision Switch
- Create a branch in the process flow, depending on criteria you specify.
- Double click on an arrow coming from the Decision Switch to specify criteria for that branch.
- When the specified criteria evaluate as true, that branch is taken. For compound conditions, add parentheses and insert AND/OR operations:
The value tested in the decision branch can come from:
- An object data field.
- A Web Service output stored as a process variable.
- A Process Decision Value (Rule Value) returned from a Rule Set.
When comparing against a Date field, many types of Date Comparisons are possible.
Parallel Gateway
- A point from which parallel paths branch out, and a point at which they merge once again. (The same element is used for both points.)
- This gateway creates a branch in the flow, allowing two sequences of tasks to proceed in parallel.
Inclusive Gateway
- A point from which conditional parallel paths branch out, and a point at which they merge once again. (The same element is used for both points.)
- This gateway creates a branch in the flow, and allows a condition to be attached to each branch.
- An inclusive gateway allows multiple paths to be in operation simultaneously, as long as their conditions are satisfied. Flow then proceeds from the join point, but only after each path that was started runs to completion.
Start Event
- Specify the starting point for the process. (The start point is required.)
Exception Event
- Drag an exception event to the edge of a process step.
- Wide, solid-green shading appears on the borders of a step when the cursor is at the edge.
- In the middle of a step, the corners are highlighted in red.
- An exception event is an interrupting boundary event, in process modeling terms. It occurs when an unanticipated error (an exception) interrupts the normal process flow.
- Examples of unanticipated errors include:
- A remote web service is down, causing a "can't connect to web service" exception
- A Rule attempts to reference a field that has no value, causing a "null or empty field" exception
- Data returned in an error response from a REST or SOAP Web Service, on the other hand, signals a "normal" error. Test for those conditions using a Decision Switch.
- An Exception Event is typically added for:
- A step that executes a Web Service or a Rule Set
- A step that sends an email
- A user task or approval step that uses a Rule Set to determine the step owner
- The path taken from an Exception Event can go to other process steps. For example it could go to a Send Email step and then stop the process. Or it might create a new user task for an admin to resolve the situation.
- If no path is defined, the process simply terminates.
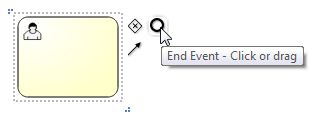
End Event
- Specify an endpoint for the process. (At least one end point is required.)
Sequence Flow
- Draw a connector between two tasks, to create a sequence.

Making Connections
In the main panel, click a Task or Event
. Several elements appear next to it. Hover over them to see a description:
- Decision Switch - A Decision Switch element is added to the process (see below), with a connection from the task
- End Event - An End Event element is added to the process, connected to the task

The final element is the connection arrow. To draw an arrow between two elements in the diagram, drag that arrow to another element:

Using the Process Editor
In addition to the Save icon seen earlier, the toolbar provides other icons that help you build Process Models:
- Cut, Copy, Paste, Delete - The standard editing operations to move or copy the selected element(s) to the clipboard (cut/copy), to copy the contents of the clipboard to the process (paste), or remove the selected element(s).
- Undo, Redo - Take back the last change, or reinstate it.
- Alignment and Sizing - Align the middles or centers of elements, or make them the same size.
- Line "Bend Points" - A red dot appears at the corner of any line that isn't totally straight. You change the shape of a line by dragging that dot. Use these controls to add an extra dot to an already-bent line, or to add a dot to a straight line. You can also use the controls to remove a dot, straightening the line at that point.
- Zoom Controls - Zoom in or out. Set page size.
- Syntax Check - Click this button to check the drawing. A large red "X" appears below any element that has a problem. Hover over the element to get an error message.

Here are some other keys you can use:
- Click and drag -Move an element to a new location.
- Ctrl+A - Select all. Good for repositioning all elements at once.
- Ctrl+Click - Add an element to the set of selected elements, or remove it if already selected.
Using an Approval Step
When you add an Approval Step, a Task is generated for the person it is assigned to. While other Tasks have a [Complete] button, an Approval task has two buttons: [Approve] and [Reject]. The button that was clicked is recorded in a special field called Approved, with values Yes or No. When a decision switch follows an Approval Step, that field is available for testing, as shown here:

Reject could go back to a previous step. Approve will generally go forward to a new task or to the end of the process.
Using Process Variables
Process Variables can be used to store values gathered from a Web Service so the data doesn't have to be stored in a record. Later, those variables can be used:
- as input to another Web Service
- when specifying the criteria for a branch from a Decision Switch.
To create a process variable and store a value:
- Add an Execute Web Service step to the model.
The service configuration dialog opens. - In the Output Mapping section, select a field returned by the Web Service.
- Choose Use Variable, and give the variable a name.
- When done configuring the service, click [Save].
The data returned in that field is stored in the named variable when the process runs.
To use a process variable as input to another service:
- Add another Execute Web Service step, downstream from other Web Services.
- In the Input Mapping section, select Use Variable.
- Select the process variable and map it to an input field for the Web Service.
- When done configuring the service, click [Save].
The data stored in the named variable is sent to the Web Service when the process runs.
To use a process variable in a Decision Switch:
- Add or edit a Decision Switch that is downstream from a Web Service.
- Edit a branch coming from that switch.
- The list of fields available for comparison includes variables defined in previous steps.
- Select the variable and specify the comparison expression to select the branch.
- Click [Save].
The data returned from the Web Service now helps to determine when a process branch is taken.
Calling Java Code from a Process
Let's say you have defined a method in a Java Class. You can't call that code directly, but you can create a Rule Set. In that Rule Set you can define a Rule whose action is to invoke that method. You then create a process step that execute the Rule Set, which invokes the code.