Part 1: Customizing an Email Template
From AgileApps Support Wiki
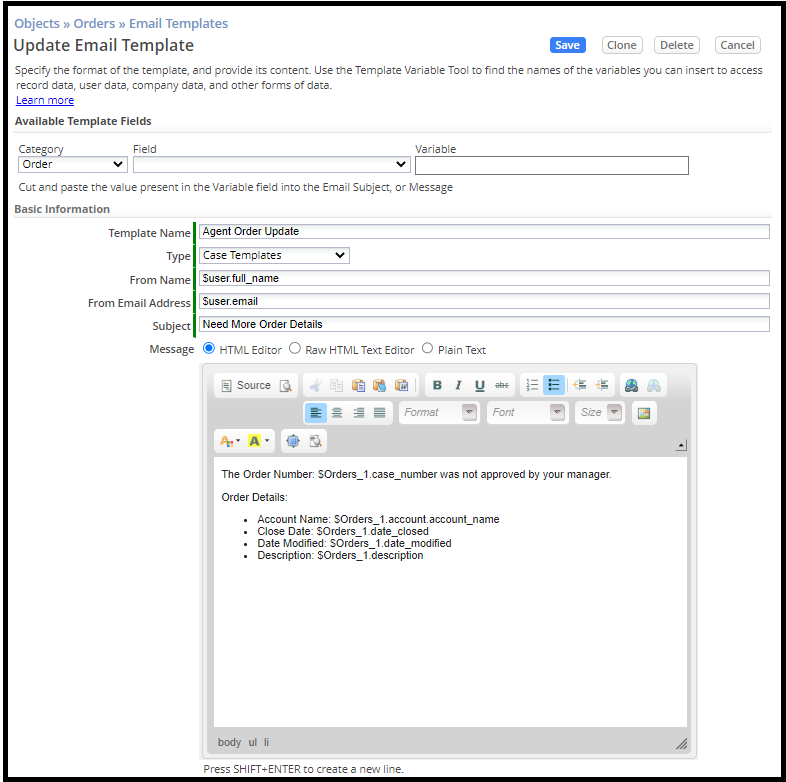
In this part of the exercise, you add content to the Email Template you created in Exercise 5. This is the template for the email that is sent to an Agent when the manager rejects an order.
- Make sure you are logged in as yourself (User with Administrator Access Profile).
- Navigate to the Configuration page, under the Customization tile, click Objects. Navigate to Orders > Email Templates.
- Open the Agent Order Update template.
- Use the Template Variable Tool to add (copy and paste) variables from the Order category to provide more information about the specific order in the email to the Agent, such as:
- The Order Number: $Orders.case_number was not approved by your manager.
- Order Details:
- • Account Name: $Orders.account.account_name
- • Close Date: $Orders.date_closed
- • Date Modified: $Orders.date_modified
- • Description: $Orders.description
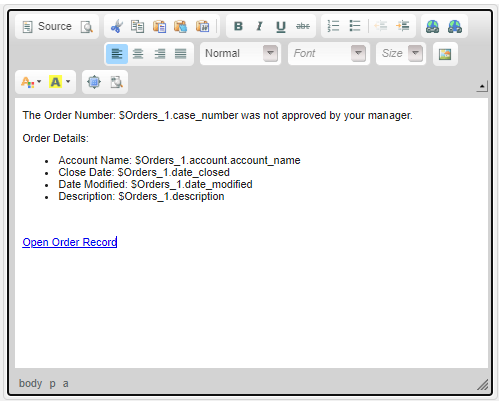
- At the bottom of the email template, add a link to open the related Order record:
- Type the text: Open Order Record
- Select the text and click the Link icon (globe with a chain).
- Specify a link using the following format – where you replace <your_subdomain> with your webMethods AgileApps Cloud tenant subdomain name:
https://<your_subdomain>.agileappscloud.com/networking/servicedesk/index.jsp#$Orders.object_id/$Orders.case_number- resp.
https://<your_subdomain>.agileappscloud.eu/networking/servicedesk/index.jsp#$Orders.object_id/$Orders.case_number - For example, for John Richards, the link is:
https://johnrichards.agileappscloud.com/networking/servicedesk/index.jsp#$Orders.object_id/$Orders.case_number - resp.
https://johnrichards.agileappscloud.eu/networking/servicedesk/index.jsp#$Orders.object_id/$Orders.case_number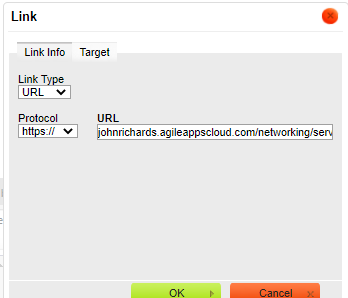
- resp.
- Save your changes.
- Test the Email Template:
- Login as yourself.
- Create a new Order record for the account Fred Supplies, assigned to the SouthEast region. Provide some Description text and pick a Close Date.
- As done in the previous exercise, change the ownership of the record and assign it to you (as Agent), but do not provide any item.
- Set the Finish Order Setup task to Complete.
- Logout and login as MyManager.
- In the MyOrders application, open the Order created previously. In the Task section on the side pane, click Reject and add a comment “This is an incomplete order. Items are lacking”.
- Open the email you receive from your manager to see the changes you made to the template:
- In the mail body, click Open Order Record to test the hyperlink.


