Customizing the ServiceDesk application in the AgileApps Cloud™
About ServiceDesk
ServiceDesk is an example of an application template that you can install and then customize to suit your purposes. However, while many application templates are somewhat “bare bones”, ServiceDesk is a full featured application that will work straight out of the box for many customer service operations.
ServiceDesk is an example of a Dynamic Case Management application--one that evolves with you as your processes mature, and which allows for ad hoc procedures (Multi Step Tasks) to be created when existing processes don't quite fit.
The primary advantage of the ServiceDesk application is that it provides a rich set of features for interacting with your customers. The primary disadvantage is that, while you can have as many
database applications and dynamic case management applications running as you like, you can have only one ServiceDesk application running in your platform instance.
If you need multiple applications, then, you should use ServiceDesk for the application in which interactions with external users is critical, since ServiceDesk provides additional features in that area.
Here is a partial list of ServiceDesk features (for more, see ServiceDesk Features in the support wiki):
- Multiple Service Level Agreements, to meet contractual obligations.
- Quick Text, so agents can add boilerplate text with a mouse click.
- Service Portal capability that lets customers track their cases, with options for Community interactions and a Knowledge Base.
To find out more about using ServiceDesk, see the ServiceDesk application page.
Customizing the Application
This discussion assumes that you will be building an Onboarding application, like the one described in the companion article, Building a Dynamic Case Management Application in the AgileApps Cloud (Links to that article and other useful pages can be found in the support wiki’s Article Index at http://agileappscloud.info/aawiki/Article_Index.) The instructions given here show you how to get started with the customization process. They show you how to:
- Change the application name.
- Change the background color and logo image in the Service Portal, a place customers can go to track cases and, depending on your configuration, engage in community interactions and/or access a knowledge base you provide.
- Change the label of the main application object, Cases. (You can do that for any object).
Customize the Application Logo and Background Color
You can also change the way the Service Portal page appears. That’s not so important in an application used only by internal users, but it could be very important if you take advantage of the Service Portal features to run a web site that lets people access a knowledge base and/or engage in community interactions.
- In ServiceDesk, go to Configuration > Channels > Service Portal.
- Under Basic Information section, enter the Title: AllAboard Acme [This value sets the name displayed in bookmarks and the browser tab.]
- In the Branding section, specify:
- Header Logo
- [Upload your organization's logo image. The standard size is 98 pixels wide by 24 pixels high. Realistic maximum size is up to 600 pixels wide by 32 pixels high.]
- For example, here is one that is 220 wide by 32 high:

- At 32 pixels high, only very simple images and stylized text are readable.
- Web Site URL
- Enter the URL the users go to when they click on your logo. (Typically, that will be your organization's website.)
- Favicon
- Upload a small favicon image that displays in the browser's address bar, in bookmarks, and in browser tabs. For example, here’s a scaled-up version of an icon file created using the IcoFx editor:

- Mobile Logo
- Upload an image that appears when the application is accessed from a mobile device.
- Important: All AgileApps applications are mobile enabled from the moment they are created.
- Announcement Widget
- Specify the title and HTML text for a welcome message or any other announcement you would like to make on this page.
- Header Background Color
- Select a background color that matches your organization's theme.
- For example, you could use one of these variations on cream: faf8cb (light), efe6ab (medium), e6d99 (dark), or F4F1DF (:pale white).
- Click Save.
- Refresh the page to see your changes.


Note:
For a complete list of configuration options, see Service Portal Settings in the support wiki.
Name the Application
At the outset, you are running the default Case Management application (Service Desk).
(The “gear” icon in the left navigation panel on the AgileApps platform. It’s the main access point for customization and administration.)
You’ll start by giving the application the desired name. Here is the procedure:
- Go to Configuration
 > Administration > Applications
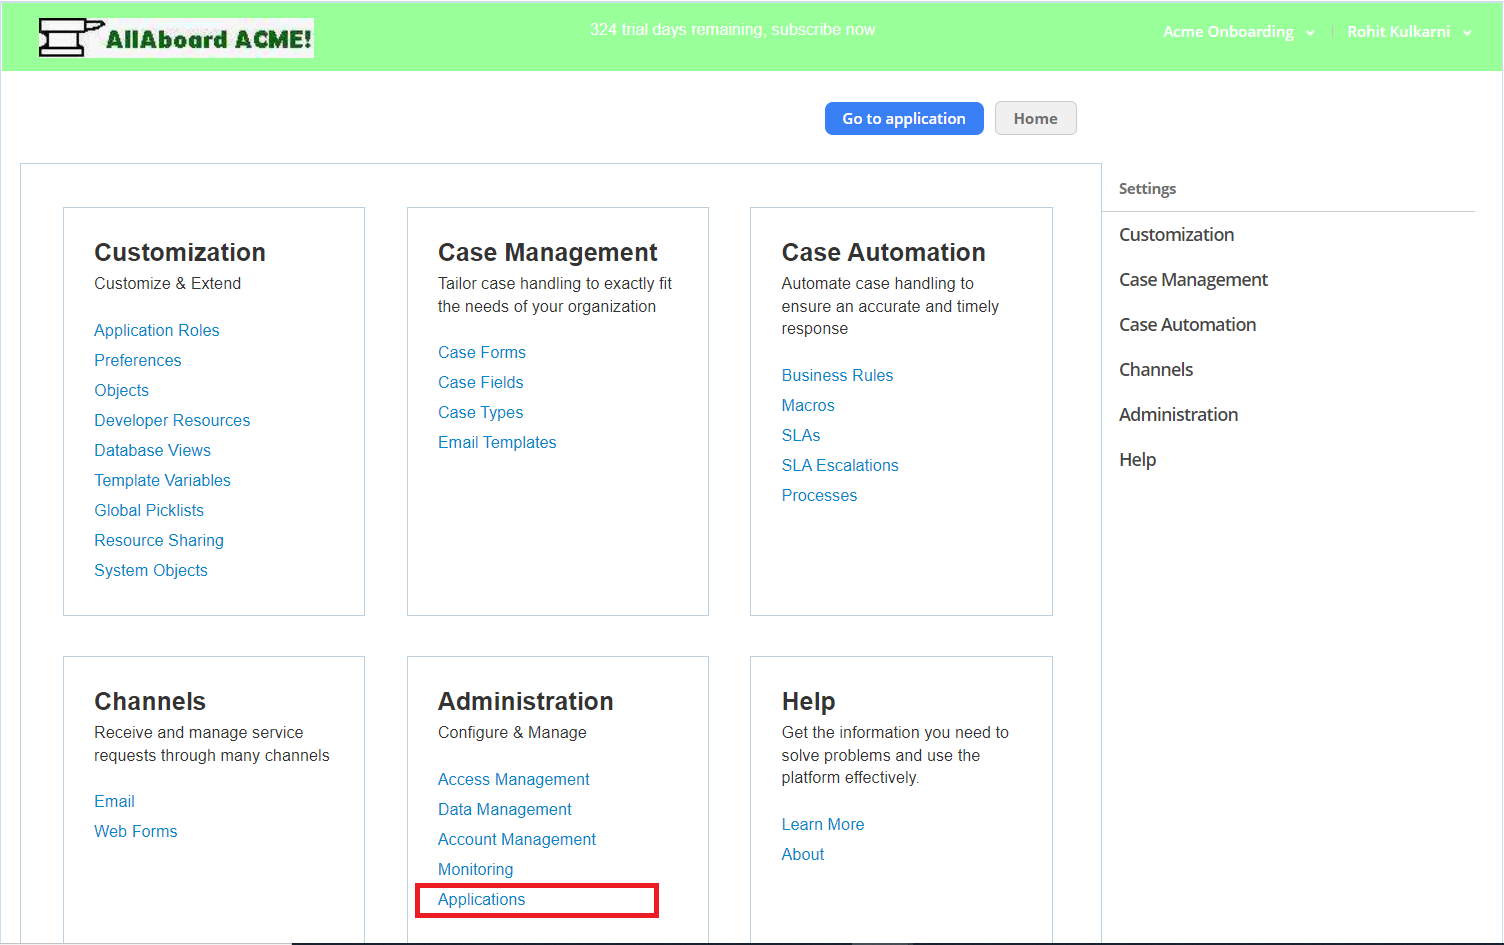
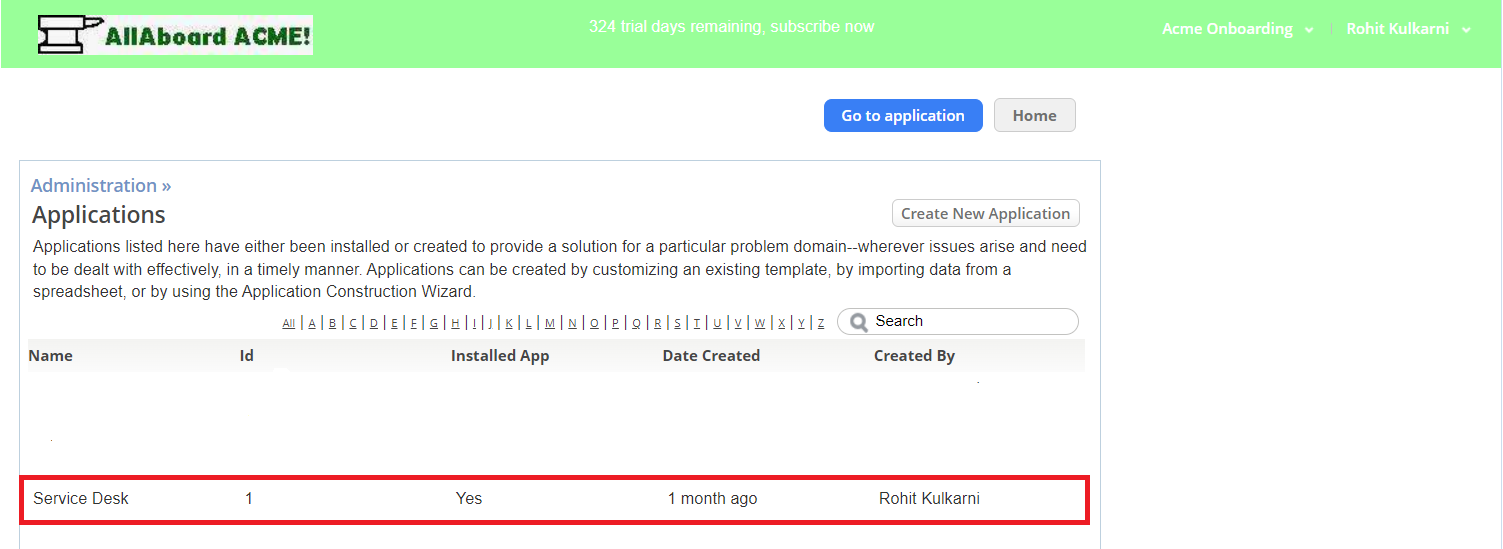
- Click the ServiceDesk application:
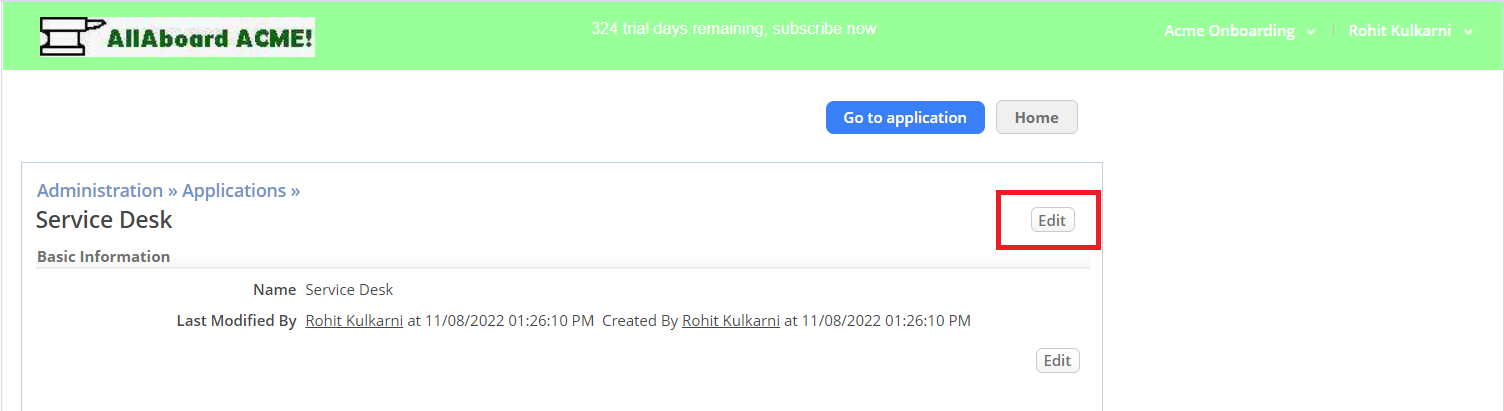
- Click Edit
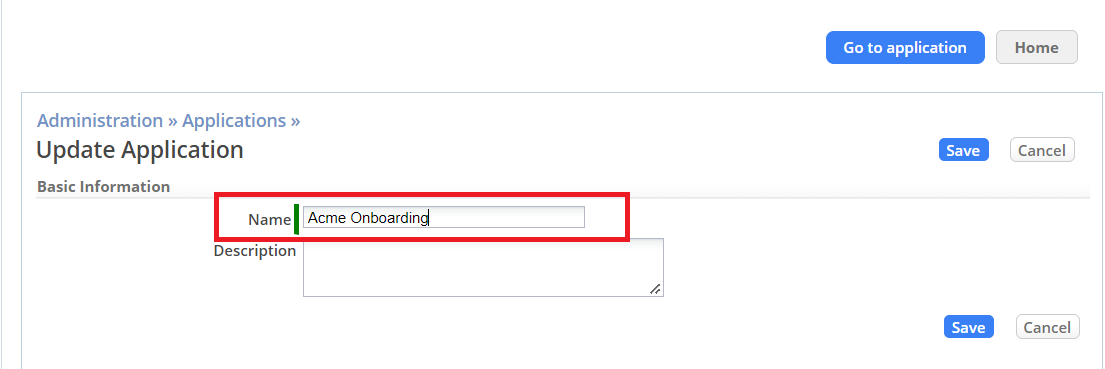
- Replace the existing name, ServiceDesk, with the new one: 'Acme Onboarding' and click Save.
- Log out and log back in again.
- The name of the application now appears as Acme Onboarding.


Customize Cases Object Labels
The first step is to modify the Cases object to give it the right labels:
- Go to Configuration > Customizations > Objects
- A list of application objects appears.
- Click on Cases.
- A page appears showing all of the Object Aspects that can be modified.
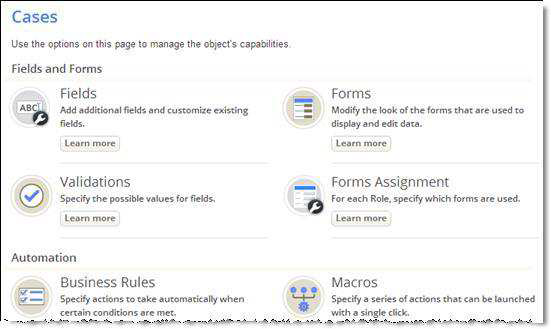
- A page appears showing all of the Object Aspects that can be modified.
- Scroll down the page and click Properties.
- The page now shows the object’s properties, including its singular and plural labels.
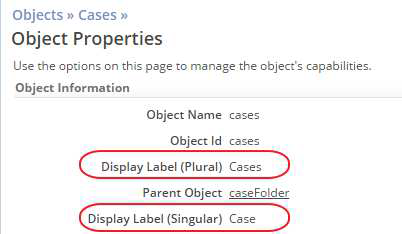
- The page now shows the object’s properties, including its singular and plural labels.
- At the bottom of the first section of properties, click [Edit], and make the following changes:
- Change Display Label (Plural) to Onboardings
- Change Display Label (Singular) to Onboarding
- Click Save and refresh the page.
- The new labels are used in several places, including the tab on the left navigation pane:
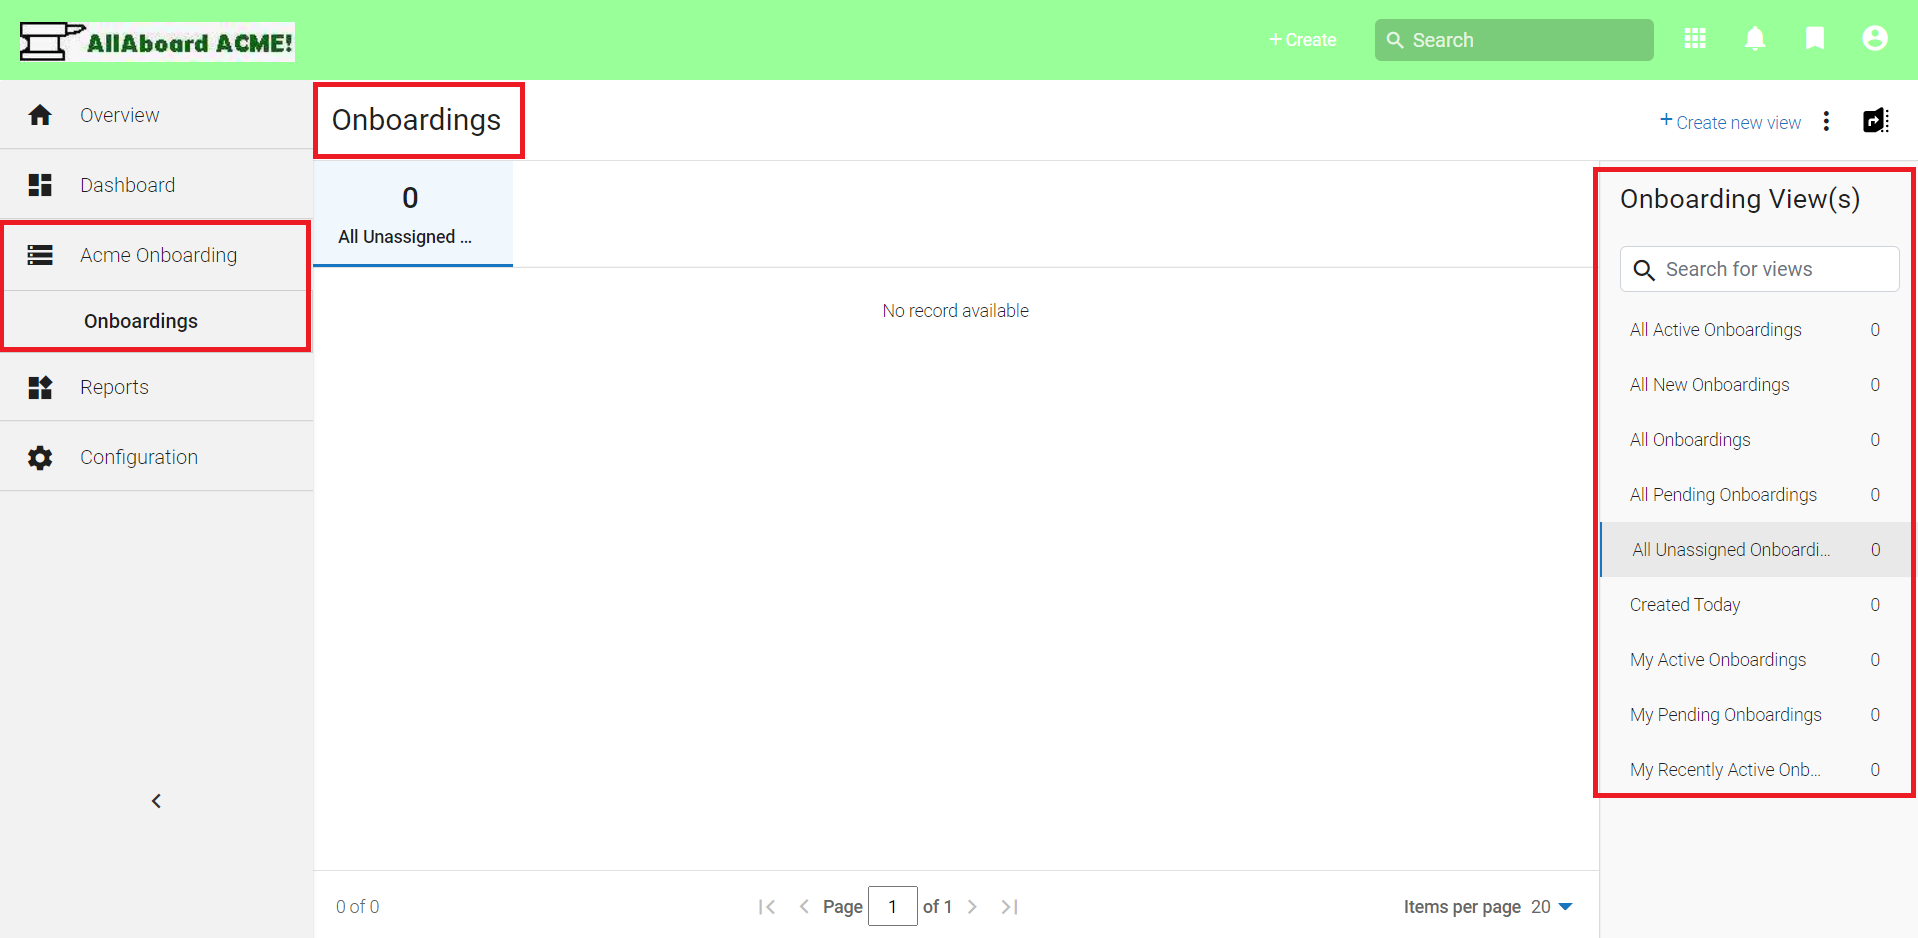
- The new labels are used in several places, including the tab on the left navigation pane:
- Go to the Onboardings tab and click Create. A Create new form appears.

- The singular label is now used in the dropdown in the Create new form:
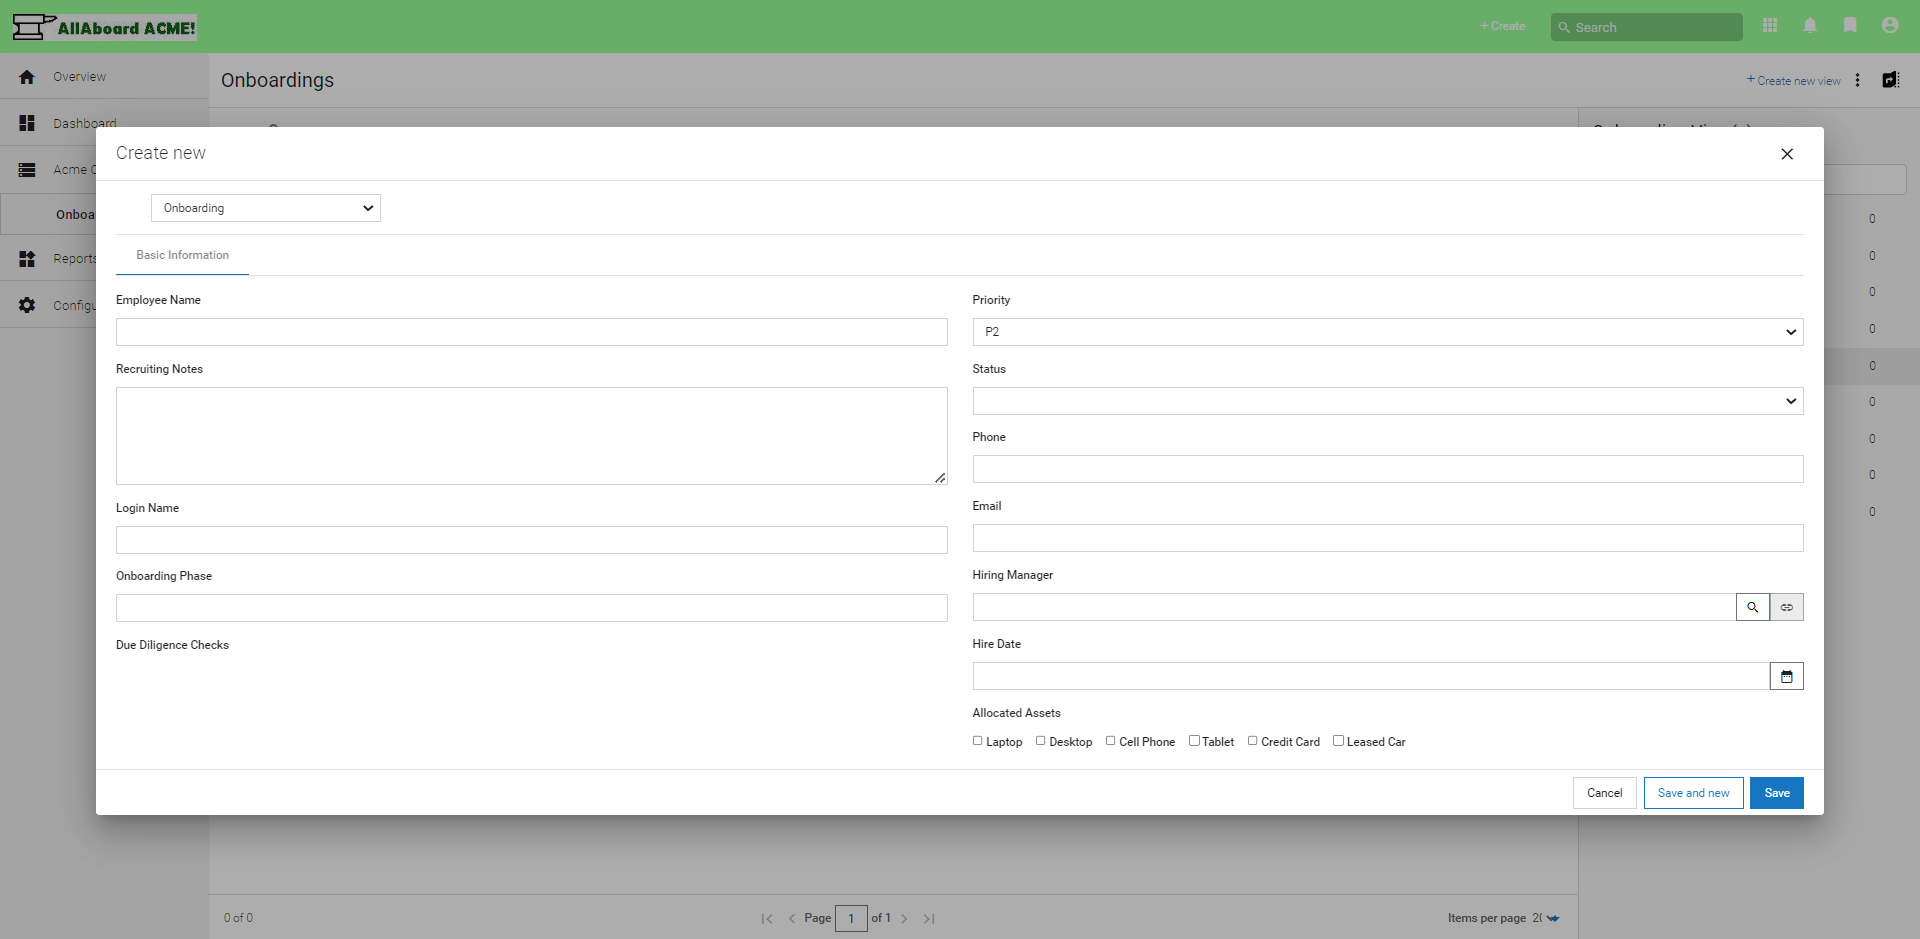
- The singular label is now used in the dropdown in the Create new form:
- The following page shows a list view of new cases that have not been assigned to anyone.


Define Service Level Agreements
- In a customer service operation, it’s not unusual to engage in contractual relationships, where certain operational objectives must be met--for example, to respond to a case in a certain amount of time, and to resolve a case in a certain amount of time. Those agreements are generally specified in a contract that spells out financial penalties when the contract is breached.
- The organization may have negotiated different contracts with different customers, or it may have pre - defined several standard service level contracts, allowing clients to choose the level of service they need.
- To make sure that the contracts are honored, the ServiceDesk operation allows the specification of Service Level Agreements, or SLAs. Each Service Level Agreement specifies the operational objectives (for example, to respond within one day and resolve within two). When a Case is created, the SLA appropriate for that case is applied.
- Each operational objective is associated with an escalation policy so that, as deadlines near, messages can be sent out and/or cases can be reassigned, to help make sure that the operational objectives are achieved.
To create a Service Level Objective:
- Go to Configuration > Case Automation > SLAs.
- Click New SLA.
- Name: Gold Level SLA
- Description: This SLA is used for Gold Level services.
- Click Save.
- Your screen now shows the SLA you created.
- You have now created the container which will hold the objectives you define for this SLA. (For instructions on that process, see the companion article, Building a Dynamic Case Management Application in the AgileApps Cloud (access it from the Article Index in the support wiki).
Next Steps
- At this point, you have performed the basic customizations you would apply to any application template to “make it your own”. You have also learned how to customize the Service Portal that is part of the ServiceDesk application. But there is much more you can do.
- For example, you can continue building the Onboarding application by performing all of the customizations shown in Building a Dynamic Case Management (DCM) Application, starting with the section entitled, Customizing the Application.
- (Links to that article and other useful pages can be found in the support wiki’s Article Index at http://agileappscloud.info/aawiki/Article_Index.)
- The moral here is that there is little difference between customizing an application and building one from scratch. Installing an application template just gives you a head start on the process.
- You can also use the Designers Index in the support wiki as a guide to your customization options. And for programmers, there is a wide-ranging set of APIs and development tools. They are surveyed at the end of the Building a DCM App article, or you can view the Developers Index in the support wiki.