Difference between revisions of "Part 3: Create a new Application using the Wizard"
From AgileApps Support Wiki
Wikieditor (talk | contribs) |
Wikieditor (talk | contribs) |
||
| Line 4: | Line 4: | ||
# Go to the '''Configuration''' page, under the '''Administration''' tile, click '''Applications'''. Click '''Create New Application'''. | # Go to the '''Configuration''' page, under the '''Administration''' tile, click '''Applications'''. Click '''Create New Application'''. | ||
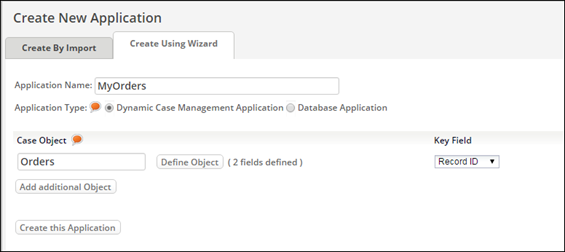
# Select the '''Create Using Wizard''' tab. Populate the wizard as shown: Specify '''MyOrders''' for the Application Name. Since it is a Dynamic Case Management (DCM) application, it includes a Case Object. Name the Case Object '''Orders'''.<br><br>[[File:Create_New_Application_Window_-_MyOrders.png|800px]]<br> | # Select the '''Create Using Wizard''' tab. Populate the wizard as shown: Specify '''MyOrders''' for the Application Name. Since it is a Dynamic Case Management (DCM) application, it includes a Case Object. Name the Case Object '''Orders'''.<br><br>[[File:Create_New_Application_Window_-_MyOrders.png|800px]]<br><br> | ||
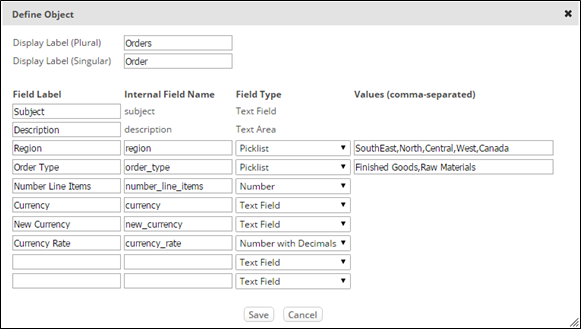
# In the Case Object section, click Define Object and then populate the dialog box as shown: | # In the Case Object section, click Define Object and then populate the dialog box as shown: | ||
#:'''Note:''' Make sure to specify Order for the Singular Form of the Display Label.<br><br>[[File:Define_Object.png|800px]]<br> | #:'''Note:''' Make sure to specify Order for the Singular Form of the Display Label.<br><br>[[File:Define_Object.png|800px]]<br><br> | ||
# Verify that the internal field names are correct and appear as shown above. For example, make sure that you did not type extra spaces in the Field Label which translate to extra underscores in the internal field name. | # Verify that the internal field names are correct and appear as shown above. For example, make sure that you did not type extra spaces in the Field Label which translate to extra underscores in the internal field name. | ||
#:'''Note:''' You can change a field label later but you will not be able to change the internal field name after you save the Object. | #:'''Note:''' You can change a field label later but you will not be able to change the internal field name after you save the Object. | ||
# Click '''Save'''. | # Click '''Save'''. | ||
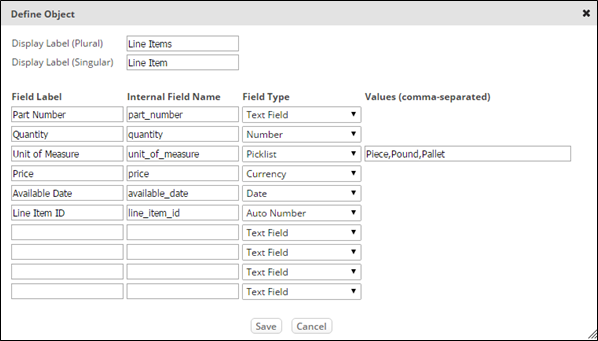
# Add an additional Object with the name '''Line Items''' to your application and define its Object fields as shown below. A Line Item defines the details of the product that the customer wants to purchase in an Order.<br><br>[[File:Define_Object_-_Line_Items.png|800px]]<br> | # Add an additional Object with the name '''Line Items''' to your application and define its Object fields as shown below. A Line Item defines the details of the product that the customer wants to purchase in an Order.<br><br>[[File:Define_Object_-_Line_Items.png|800px]]<br><br> | ||
# Click '''Save'''. | # Click '''Save'''. | ||
# Add a Relationship of type '''One to Many''' between the '''Orders''' and '''Line Items'''' Objects as shown:<br><br>[[File:Define_Relationships.png|800px]]<br> | # Add a Relationship of type '''One to Many''' between the '''Orders''' and '''Line Items'''' Objects as shown:<br><br>[[File:Define_Relationships.png|800px]]<br><br> | ||
#:'''Note:''' The One to Many relationship means that an Agent can specify many products for a customer to purchase in one order. | #:'''Note:''' The One to Many relationship means that an Agent can specify many products for a customer to purchase in one order. | ||
# Click '''Create this Application'''.<br><br>[[File:Application_Creation_Successful_Window.png|500px]] | # Click '''Create this Application'''.<br><br>[[File:Application_Creation_Successful_Window.png|500px]]<br><br> | ||
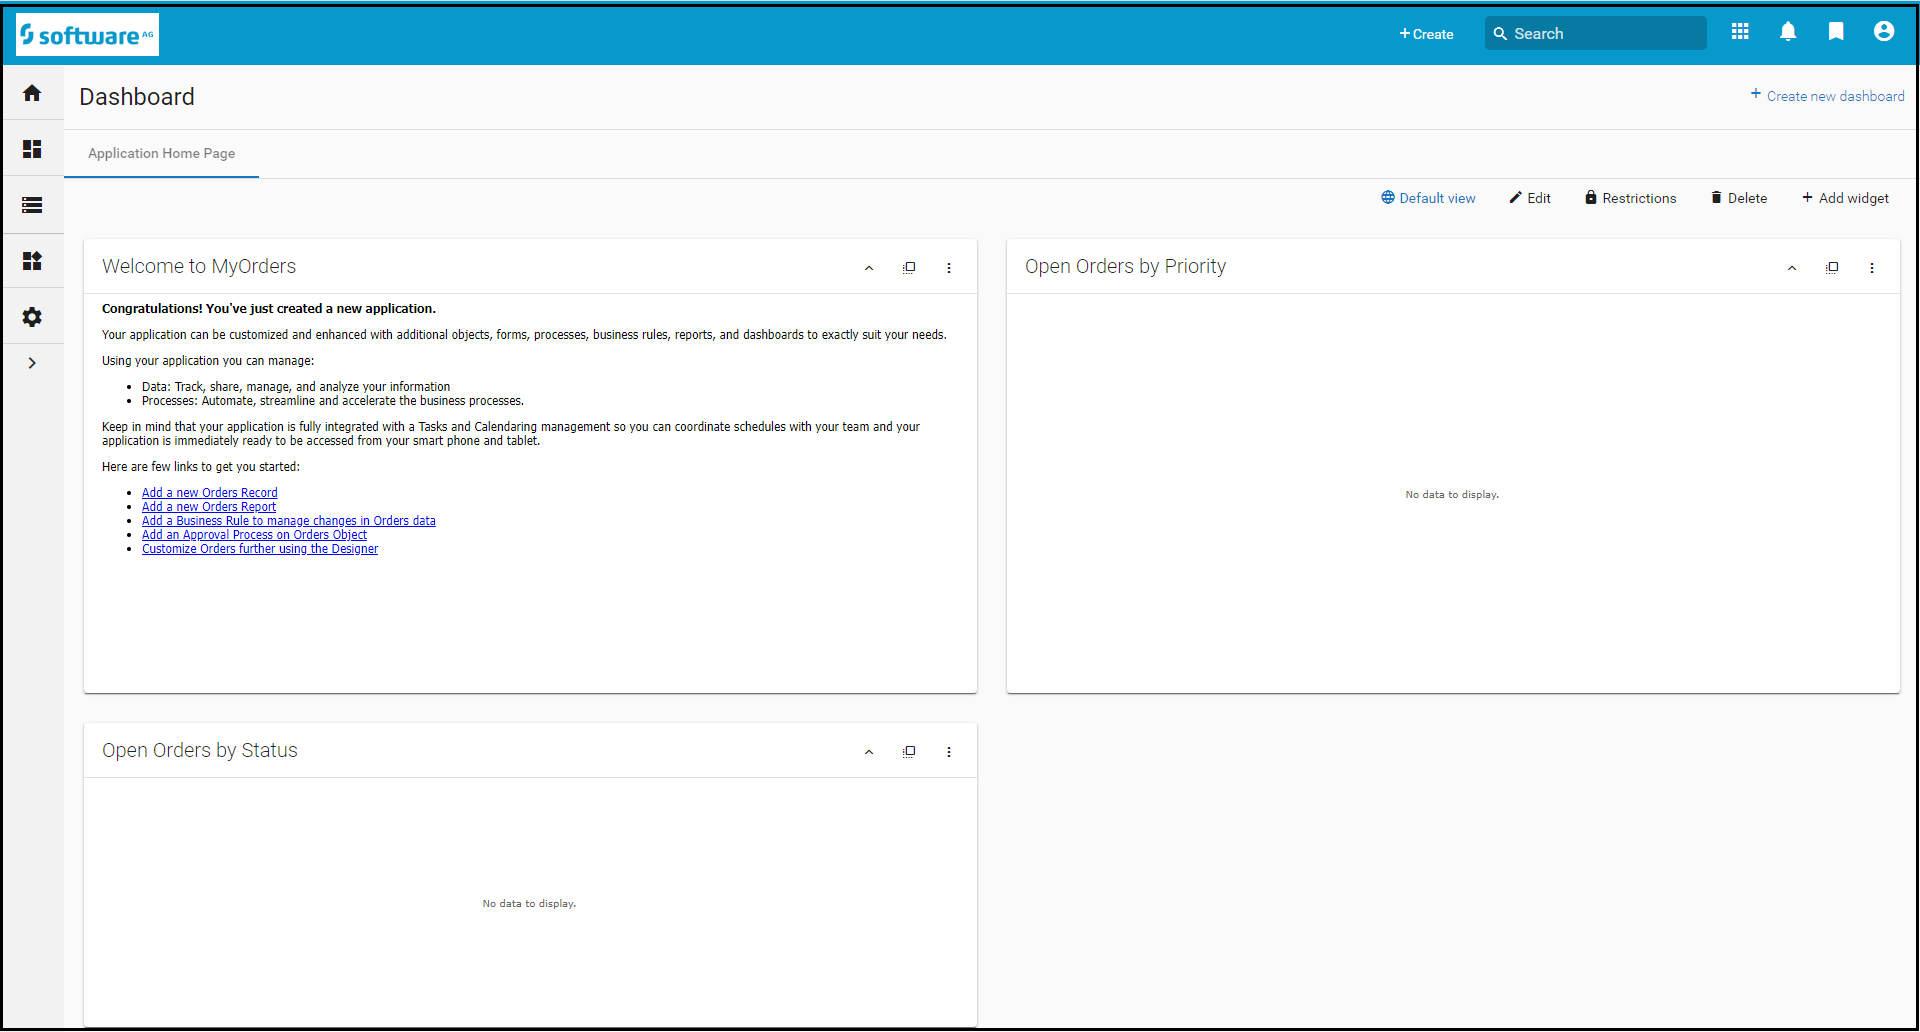
# Click '''Ok'''. Confirm to leave the page. The new application appears in the browser:<br><br>[[File:MyOrders_Application_Dashboard.PNG|800px]] | # Click '''Ok'''. Confirm to leave the page. The new application appears in the browser:<br><br>[[File:MyOrders_Application_Dashboard.PNG|800px]]<br><br> | ||
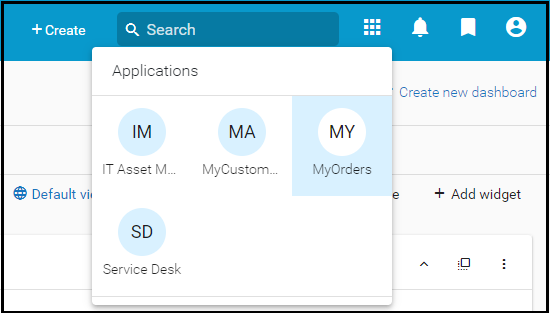
# Note that the Application drop-down list now shows the Service Desk application and the three applications that you created in this exercise:<br><br>[[File:Application_drop-down_2.PNG]] | # Note that the Application drop-down list now shows the Service Desk application and the three applications that you created in this exercise:<br><br>[[File:Application_drop-down_2.PNG]]<br><br> | ||
#: Only one application can be opened/displayed at a time. | #: Only one application can be opened/displayed at a time. | ||
Latest revision as of 04:11, 29 December 2022
In this part of the exercise, you will create a new simple Order Management system application from scratch by using the Wizard.
This application will be an Order Management System (OMS) that tracks Orders for a company that sells finished goods and raw materials to its customers. It will be a dynamic case management (DCM) application that has a case Object (that you will rename Order). You will also add an additional Object (Line Items) that will define the details of a product in an Order.
- Go to the Configuration page, under the Administration tile, click Applications. Click Create New Application.
- Select the Create Using Wizard tab. Populate the wizard as shown: Specify MyOrders for the Application Name. Since it is a Dynamic Case Management (DCM) application, it includes a Case Object. Name the Case Object Orders.
- In the Case Object section, click Define Object and then populate the dialog box as shown:
- Note: Make sure to specify Order for the Singular Form of the Display Label.
- Note: Make sure to specify Order for the Singular Form of the Display Label.
- Verify that the internal field names are correct and appear as shown above. For example, make sure that you did not type extra spaces in the Field Label which translate to extra underscores in the internal field name.
- Note: You can change a field label later but you will not be able to change the internal field name after you save the Object.
- Click Save.
- Add an additional Object with the name Line Items to your application and define its Object fields as shown below. A Line Item defines the details of the product that the customer wants to purchase in an Order.
- Click Save.
- Add a Relationship of type One to Many between the Orders and Line Items' Objects as shown:

- Note: The One to Many relationship means that an Agent can specify many products for a customer to purchase in one order.
- Click Create this Application.

- Click Ok. Confirm to leave the page. The new application appears in the browser:
- Note that the Application drop-down list now shows the Service Desk application and the three applications that you created in this exercise:
- Only one application can be opened/displayed at a time.


