Difference between revisions of "Part 1: Create an Application from an Excel Spreadsheet"
From AgileApps Support Wiki
Wikieditor (talk | contribs) |
Wikieditor (talk | contribs) |
||
| Line 14: | Line 14: | ||
# Notice that the new application is now available in the Application drop-down list at the top of the browser:<br>[[File:Application_drop-down.PNG]] | # Notice that the new application is now available in the Application drop-down list at the top of the browser:<br>[[File:Application_drop-down.PNG]] | ||
# Try adding a new fictitious customer record by clicking the Add a new MyCustomer Record link in the Dashboard tab. | # Try adding a new fictitious customer record by clicking the Add a new MyCustomer Record link in the Dashboard tab. | ||
------------------------------------------------------------------------------------------------------------------------------------------------------------------------------------------------------------------------------------------------------------------------ | |||
:{| border="0" align="left" cellpadding="5" cellspacing="1" | |||
| | |||
[[Exercise 02: Creating Applications and Defining Objects|Previous]] | |||
|} | |||
:{| border="0" align="right" cellpadding="5" cellspacing="1" | |||
| | |||
[[Part 2: Create an Application by starting with a sample application|Next]] | |||
|} | |||
Revision as of 10:31, 14 December 2022
In this part, you will create a basic webMethods AgileApps Cloud application based on data extracted from an Excel document (.CSV file). The first row of data in the spreadsheet determines the name of the table columns in the AgileApps application. Perform the following steps to create an Application from an Excel Spreadsheet:
- Go to the Configuration page, under the Administration tile, click Applications. Click the Create New Application button.
- On the Create by Import tab, select From File and browse for the file:
<workshop_dir>\CustAddressData.csv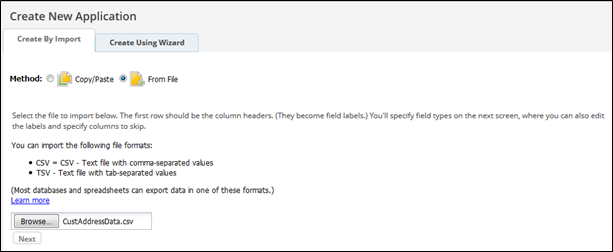
- Click Next. The data import page appears. By default, all of the field types are set to the Text field.
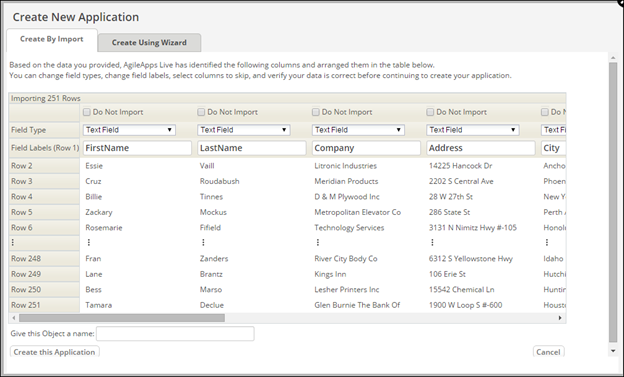
- Change the field types of the following fields to the appropriate webMethods AgileApps Cloud field types (in parenthesis):
- Phone (Phone/Fax)
- Fax (Phone/Fax)
- Email (Email Address)
- Web (URL)
- Name the application (Object) MyCustomer.
- Scroll to the bottom of the window, click Create this Application, click Ok, and finally confirm to leave the page.
- The MyCustomer application opens in the browser:
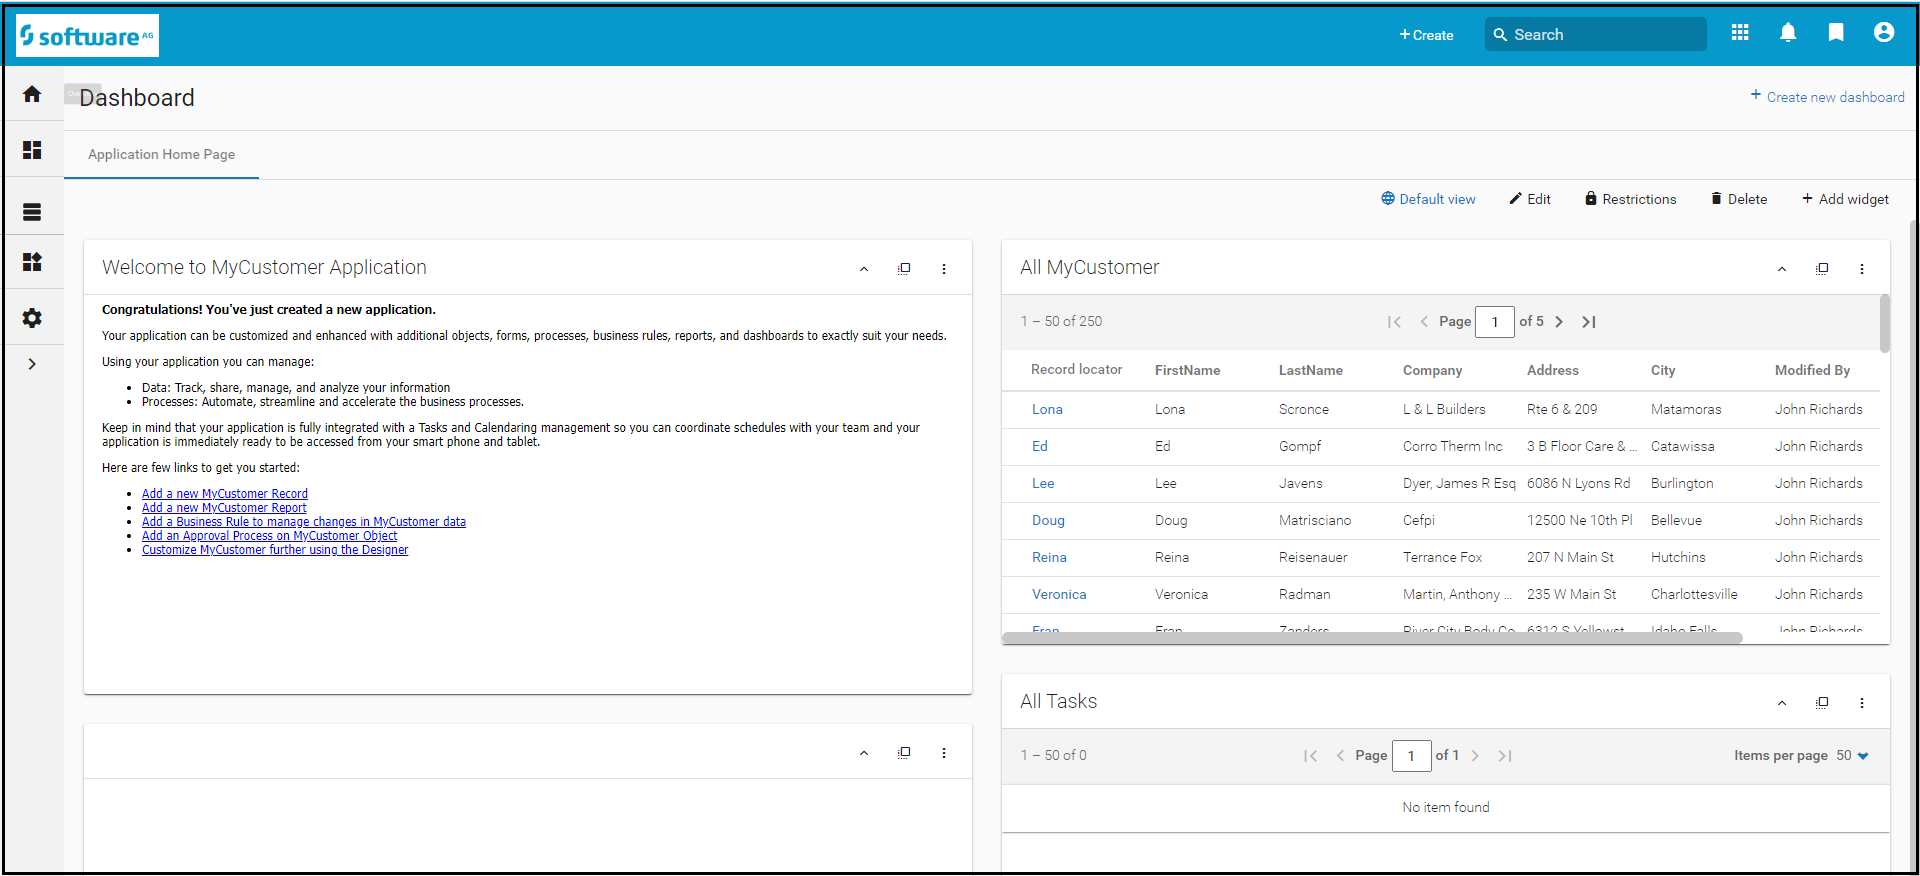
- The MyCustomer application opens in the browser:
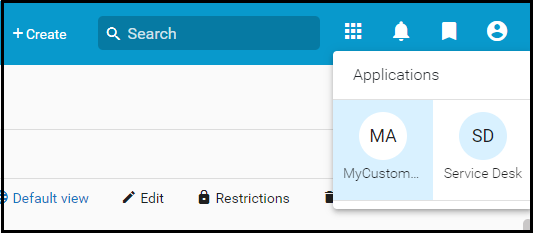
- Notice that the new application is now available in the Application drop-down list at the top of the browser:
- Try adding a new fictitious customer record by clicking the Add a new MyCustomer Record link in the Dashboard tab.


