Difference between revisions of "Macros"
imported>Aeric |
Wikieditor (talk | contribs) |
||
| (One intermediate revision by the same user not shown) | |||
| Line 5: | Line 5: | ||
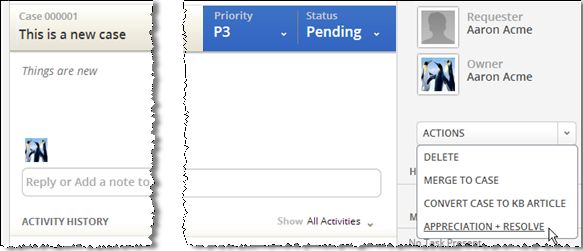
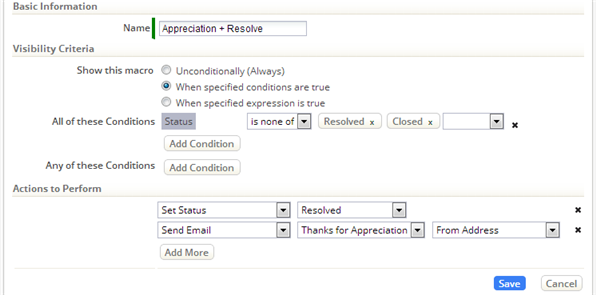
Macros appear in the list of actions that are available when working with a record. They can be set up to appear only when certain conditions are met, and they can perform one or more actions. Here, you see one of the default macros that comes with the system--one that marks a Case as Resolved and sends a note of appreciation for the report: | Macros appear in the list of actions that are available when working with a record. They can be set up to appear only when certain conditions are met, and they can perform one or more actions. Here, you see one of the default macros that comes with the system--one that marks a Case as Resolved and sends a note of appreciation for the report: | ||
:[[File:CaseMacro_plain.png]] | :[[File:CaseMacro_plain.png]] | ||
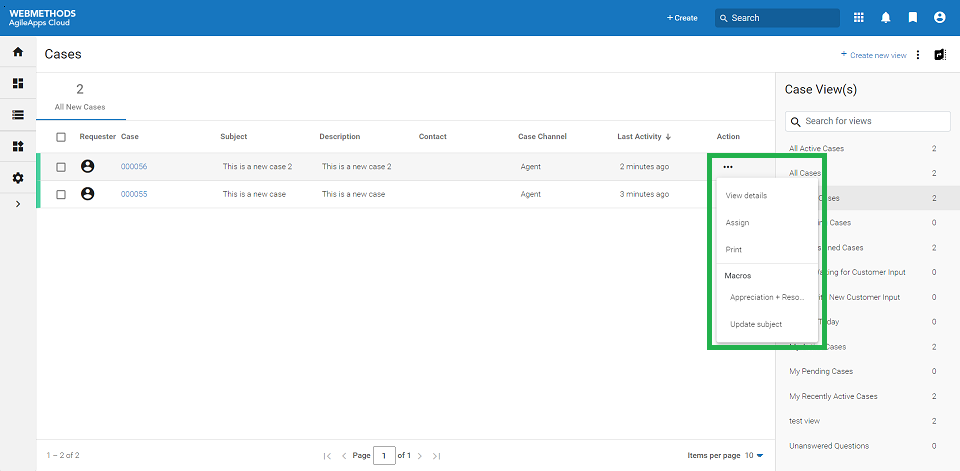
{{Note| Macros also appear on the record list view under ''Action'' in the AgileApps new user interface.}} | |||
:[[File:Macros NewUI.png]] | |||
===Using Macros for Testing=== | ===Using Macros for Testing=== | ||
Latest revision as of 06:25, 29 July 2022
![]() > Case Automation > Macros
> Case Automation > Macros
![]() > Objects > {object} > Macros
> Objects > {object} > Macros
About Macros
Macros appear in the list of actions that are available when working with a record. They can be set up to appear only when certain conditions are met, and they can perform one or more actions. Here, you see one of the default macros that comes with the system--one that marks a Case as Resolved and sends a note of appreciation for the report:
Using Macros for Testing
Macros can also be used for testing. For example, you can use a macro to:
- Send an email, to test a template
- Execute a rule set, to test conditions
- Start a process, to test an execution path
- Invoke a method, to test code
Working with Macros
- Go to
 > Case Automation > Macros
- To enable or disable a macro, click the button that appears next to it:
- To create a macro, click [New Macro].
- To edit a macro, click either the macro name or the gear icon.
- You can also click items in the icon list to change the order of the macro in the list, delete it, or clone it.
(Hovering over the icons shows you which is which.) - When you're done, click [Save].
- The macro now appears in the Record Actions List when the specified conditions are satisfied.
Visibility Criteria
Visibility criteria determines when the macro can be seen and selected.
Unconditionally (Always)
- Use this option for actions that should occur whenever the Rule is invoked.
(This option is not present for Scheduled Rules.)When Specified Conditions are True
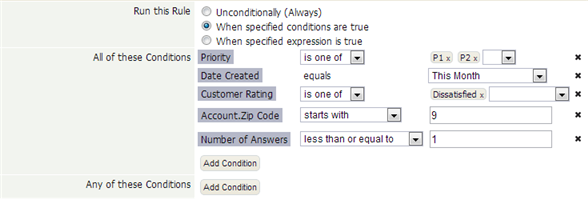
- Use this option to specify a series of conditions that determine whether the Rule's actions are carried out.
- All of the Conditions are met - Every condition in this category must be satisfied
- Any of the Conditions are met - At least one of the conditions in this category must be satisfied.
- For example, here are tests for a variety of conditions, to show the kinds of possibilities that exist:
- Learn more: Defining Conditions
When Specified Expression is True
- More complex conditions can be specified using the Formula Builder. For example, here is an expression that checks for either P1 or P2 priority on a new case:
- Expressions also allow the use of the platform's built-in Formula Functions. For example, this expression returns true only of a specific field has changed, and if had some specific value before it changed:
- AND( ISCHANGED('some_field'),
- IF(PRIORVALUE(some_field) == 'some_value', true, false) )
- Learn more:
- ISCHANGED function
- PRIORVALUE function
Actions
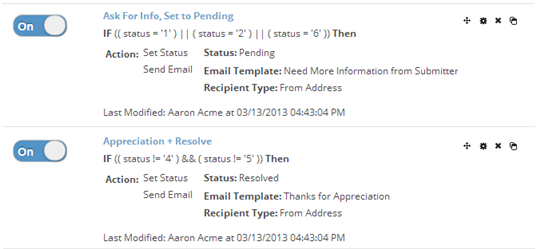
The two actions defined for this macro are to set the Case status, and to send an email:
When you choose the email option, you are prompted to select specify the template to use, and who to send it to. (In this example, the message is sent to the From Address -- the address of the person who reported the case.)
