Part 3: Explore the Service Desk Application
When you create a (trial) tenant on the AgileApps Cloud platform, the webMethods AgileApps Cloud Service Desk is the default application provided for you. This application has a variety of built-in functionality that you can use and customize to suit your business requirements.
Note that you can also create other applications on your tenant (which you will do in a later exercise). But while you can have as many Dynamic Case Management applications and Database Applications on your tenant as you like, your tenant can have only one copy of Service Desk.
Service Desk is an example of a Dynamic Case Management system, but it is specialized to provide additional features for customer support. Service Desk is all about servicing customers.
The Service Desk has the two following interfaces:
- A Service Portal - A way for your external Users (customers) to track and interact with cases.
- An Agent Portal - A way for internal Users (Agents) to track and interact with cases.
As the person who created your AgileApps Cloud tenant, by default the Administration Access Profile grants you all privileges, including those of an Agent (internal User).
In this part of the exercise, you will be acting as an internal User as you explore the Agent Portal of the Service Desk application.
- The Service Desk application does not contain any initial data. To create the first case for your Service Desk application:
- Click the Cases tab.
- Click + Create to create a new Case.
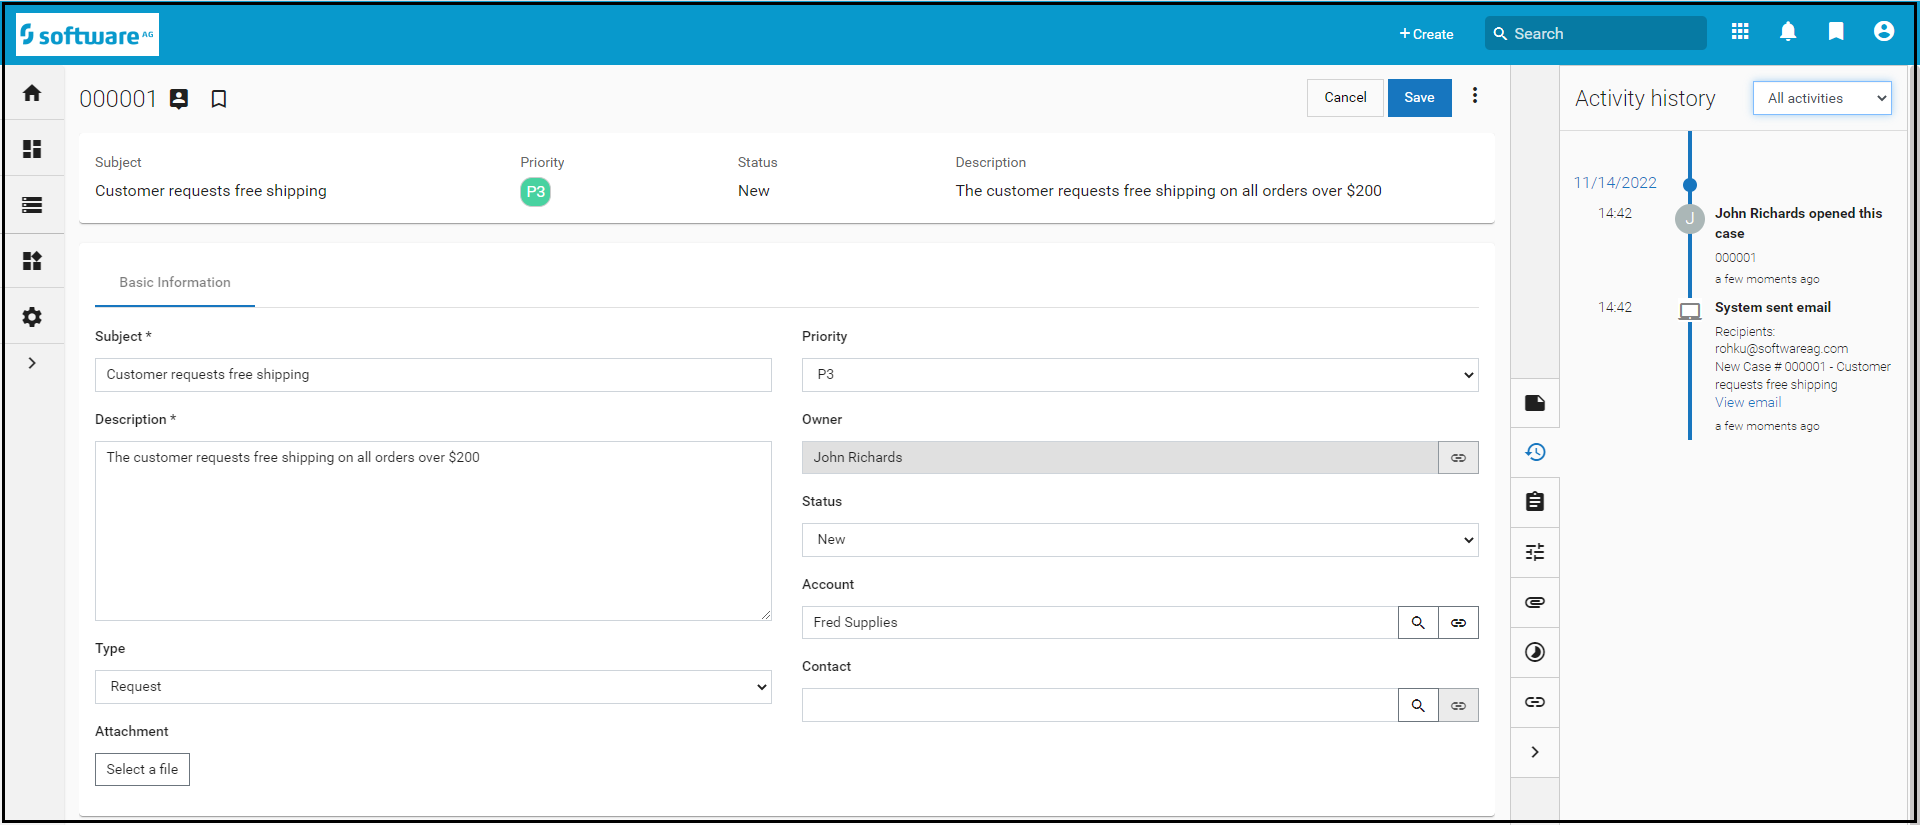
- The New Case dialog box appears. This is the Form that a User in the Agent Role of your Service Desk application would use to submit a case. Depending on a User’s Role, they would see a different version of this dialog box, with different fields.
- Fill in the values, as shown below:
- For the Account field, select the Lookup icon.
- Since there are no existing accounts, click Add New Record.
- Fill in the details as shown below:

- Click Save.
- In the Accounts field, select Fred Supplies, and click Save.
- On this page, you (as an Agent User) can access detailed information about the Case, as well as perform actions such as assigning the case to a different Agent.
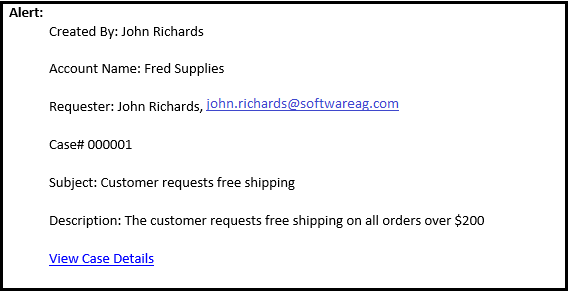
- Check your emails for the account you specified in exercise 1 step 4. You should have received a new email looking like this:
- Look at the default provided Business Rules for Cases:
- Go to the Configuration page, under the Customization tile, click Objects.
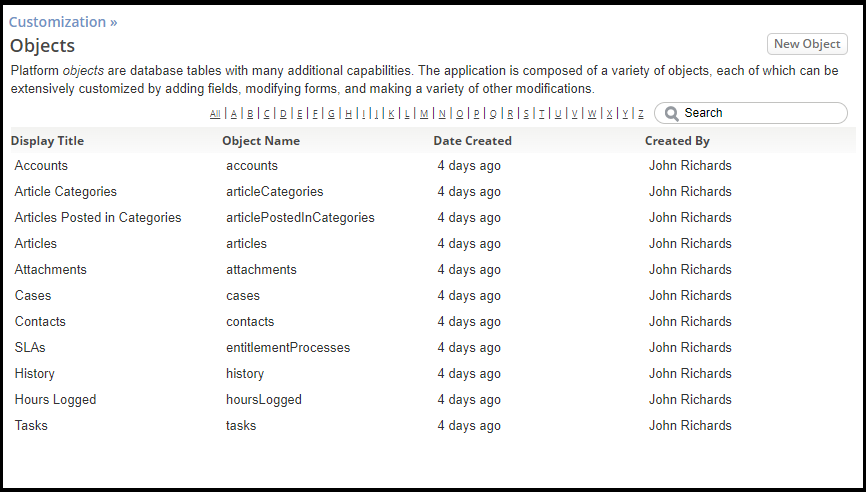
- Note: The Service Desk application provides a variety of Objects which you can share with other applications that you create. You will learn more about creating other applications and Objects in later exercises.
- Select the Cases Object, then Business Rules. Note the different types of Business Rules (Event Rules, Scheduled Rules, Timer Rules, and Rule Sets). There are two default Rules for the Cases Object that are based on time-related events.
- Click Timer Rules:
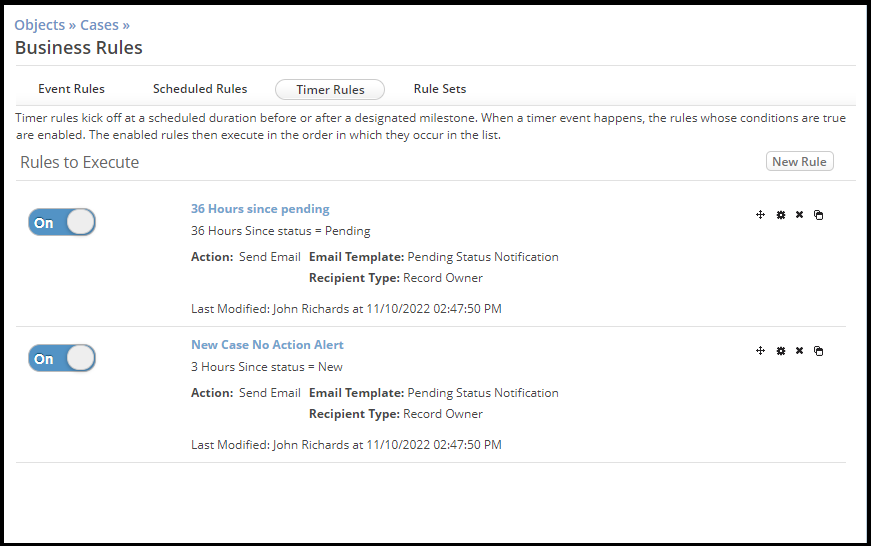
- If you leave the status of the new Case (which you created in Step 1) set to New, in 3 hours you will receive an email stating that the case has not been addressed.
- You can optionally:
- Wait and receive the email
- Edit the Case and change its status. (If you change the status to Pending, you will get another email after 36 hours if you do not change the status again.)
- Turn off the Rule (click the On toggle to change it to Off).
- Go to the Configuration page, under the Customization tile, click Objects.


Taking It Further
To learn more about the Service Desk application, see the ServiceDesk application page. Service Desk features are documented in the support iWiki.