Part 1: Customizing the Default Layout Form
From AgileApps Support Wiki
In this part of the exercise, you update the Default Form that was generated for your application Object, Orders, by adding some additional fields and functions to make the Form more realistic.
- Look at the default Form created by the system when you created the MyOrders application:
- Log in to your AgileApps Cloud tenant as yourself (not as MyManager) and select application MyOrders.
- Go to the Configuration page, under the Customization tile, click Objects. Click the Orders Object.
- Note: This page shows the toolset you use to edit the Orders system Object that was generated when you created the MyOrders application - this Object is a system-managed data table in webMethods AgileApps Cloud.
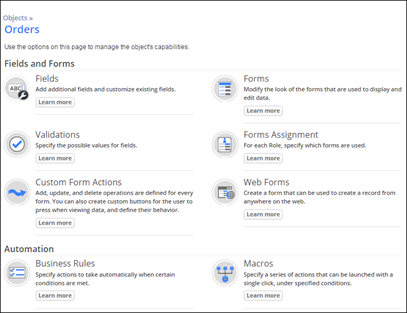
- Note: This page shows the toolset you use to edit the Orders system Object that was generated when you created the MyOrders application - this Object is a system-managed data table in webMethods AgileApps Cloud.
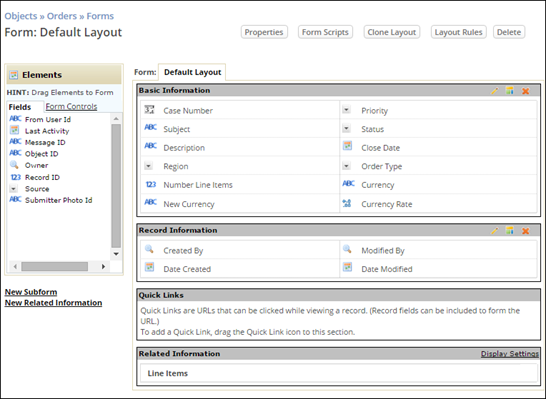
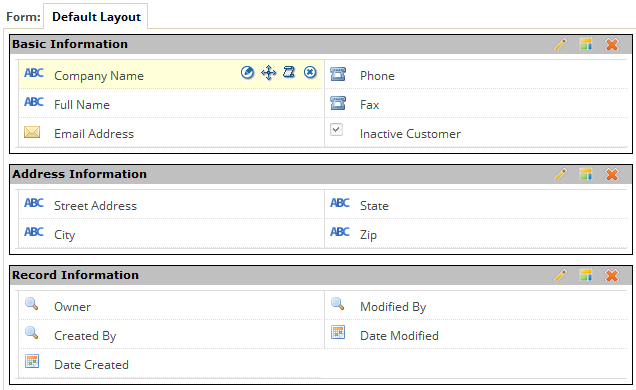
- Click Forms and click the Default Layout Form. The Form editor appears:
- Look at the Agent’s (internal User’s) perspective of the Default Form:
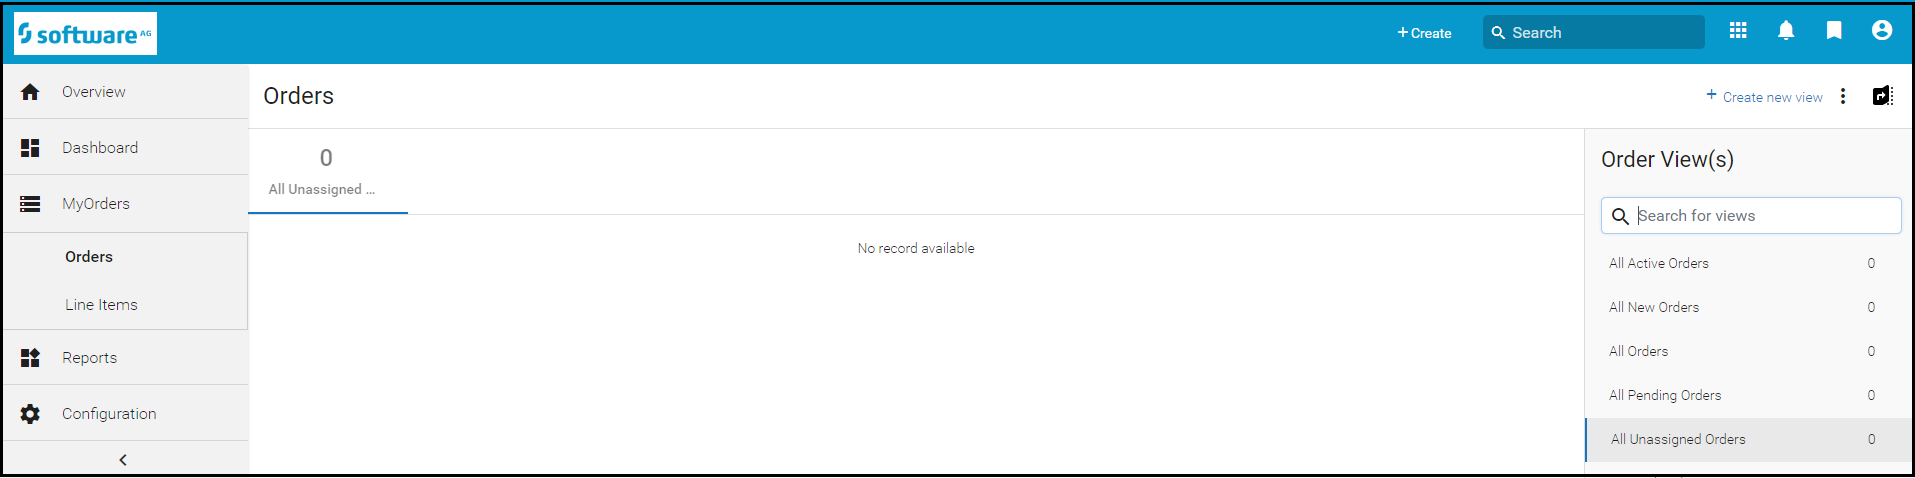
- Select the Orders tab.
- Click +Create on the header bar. The default Create new Order Form appears:
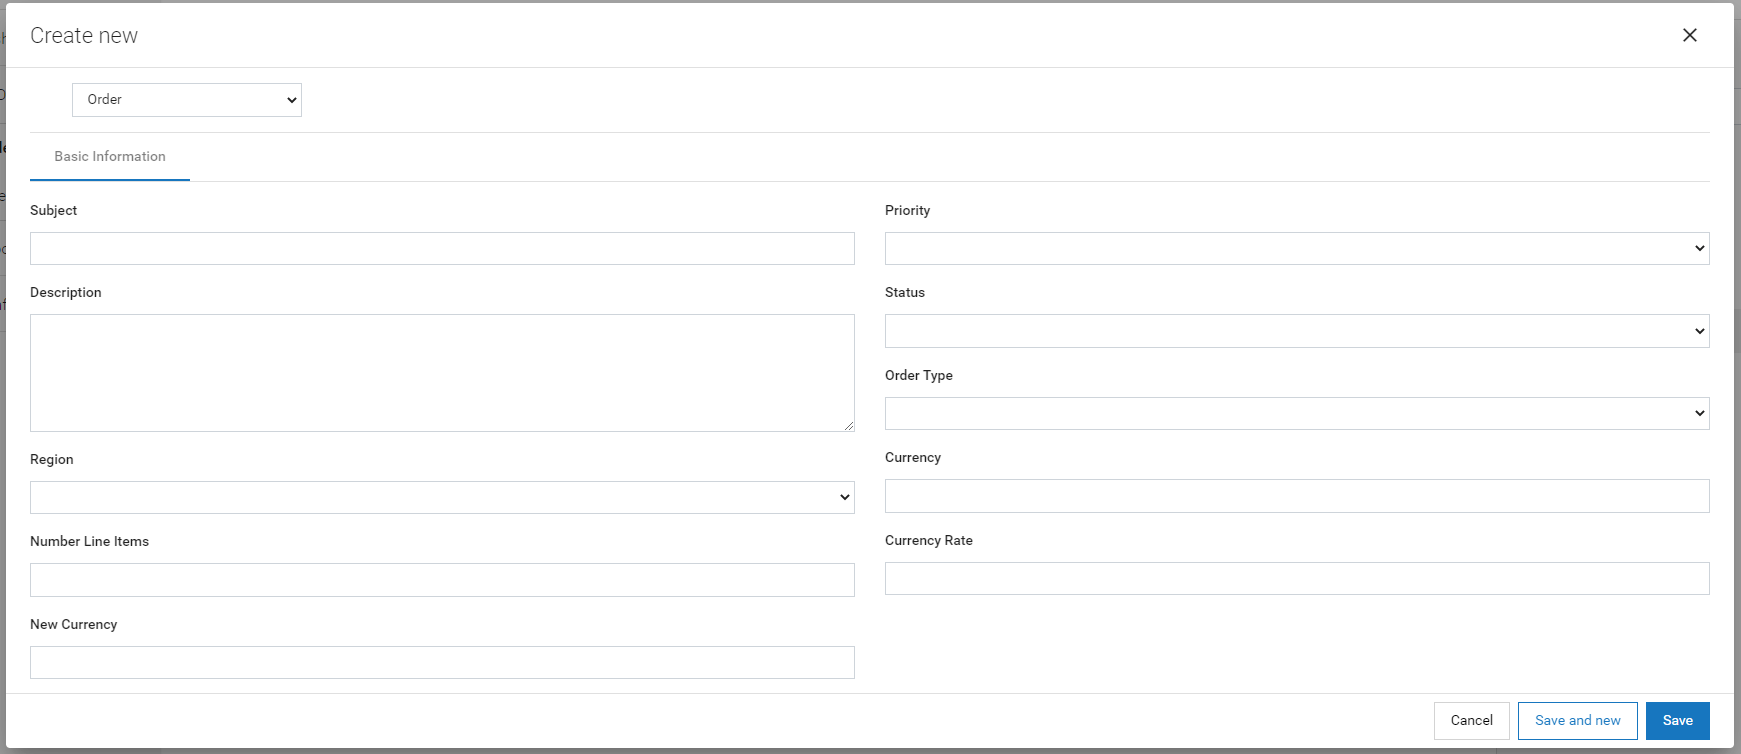
- Add some values to the Form and click Save.
- Note: There is an extra field, Subject, which is not needed.
- You will remove this field in a later step.
- Select the Orders tab.
- Share an existing Object (that was defined in a different application) with the MyOrders application:
- Go to the Configuration page, under the Customization tile, click Resource Sharing.
- The Resource Sharing view shows all the other Objects that you can add to your application. For example, the Accounts Object lets you track information about another organization you are doing business with. This Object was provided with the Service Desk application.
- Select Accounts and move it to the Selected box:
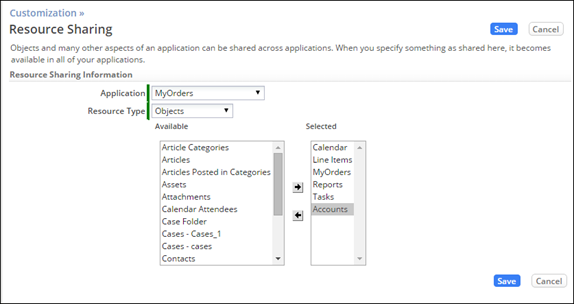
- Click Save.
- Go to the Configuration page, under the Customization tile, click Resource Sharing.
- To update the Orders Object to relate to the shared Accounts Object:
- Go to the Configuration page, under the Customization tile, click Objects. Click Orders.
- Click Fields to see a list of all available fields, then click New Field.
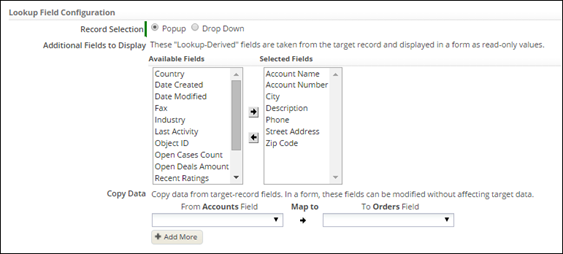
- Populate the page as shown to add Account as a Lookup field. Moreover, provide fields Account Name, Account Number, City, Description, Phone, Street Address, and Zip Code as Lookup-derived fields to be displayed for an Order:
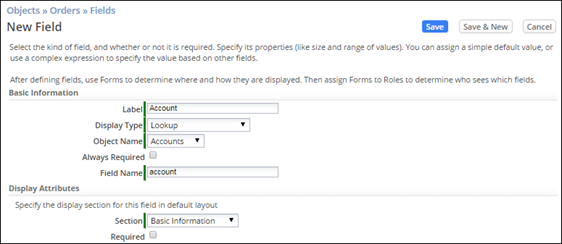
- Click Save.
- To update the Order Default Form:
- Go to the Configuration page, under the Customization tile, click Objects. Navigate to Orders > Forms > Default Layout.
- Remove the “extra” fields: Case Number and Subject by selecting the field and clicking the X icon that appears.
- Create a new section for the Accounts Lookup field, by clicking on the Form Controls tab in the Elements palette, then drag and drop Section from the palette to the Default Form, below the Basic Information section. Type Account Information for the Section Title.
- Drag and drop fields from the left-hand Fields palette to the Account Information section:
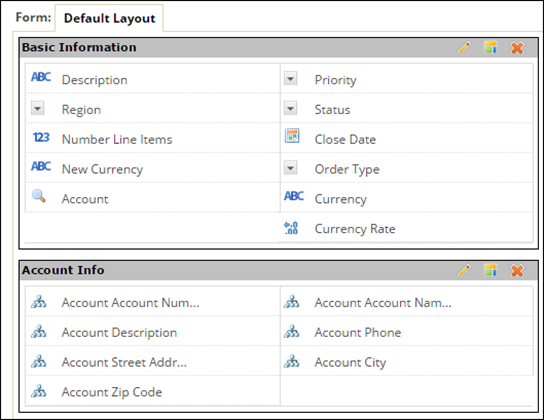
- Click Save Changes.
- Scroll down to view the Related Information section which shows information about the Line Items that are associated with the current order. This section will be displayed in the View Details section of an order, after an Agent creates an order record.
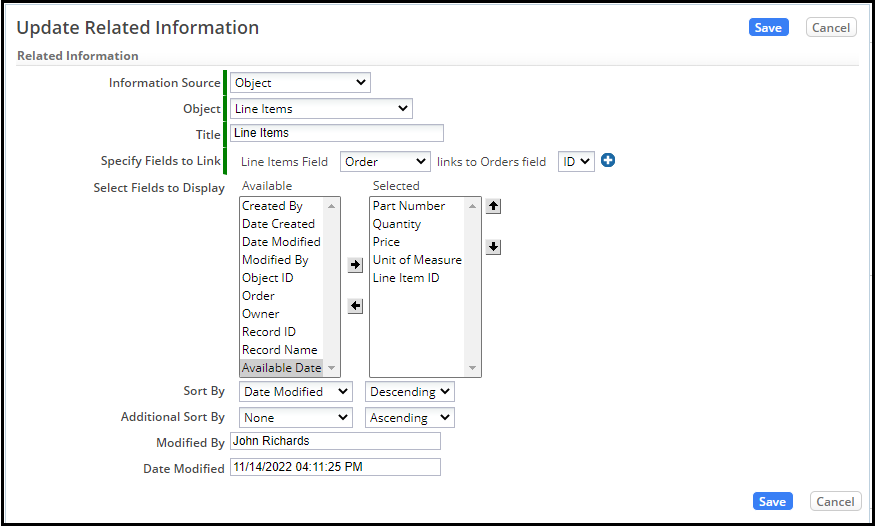
- Click the Edit Related Information icon.

- Edit this section as shown to display the following five Line Items fields for an Order in the given sequence:
- Click Save.
- Next, to see how the updates you made to the Default Layout Form on an Order impact the UI used by an Agent, create a new Order record:
- Select the Orders tab and click New Order.
- Fill in the order fields as shown:
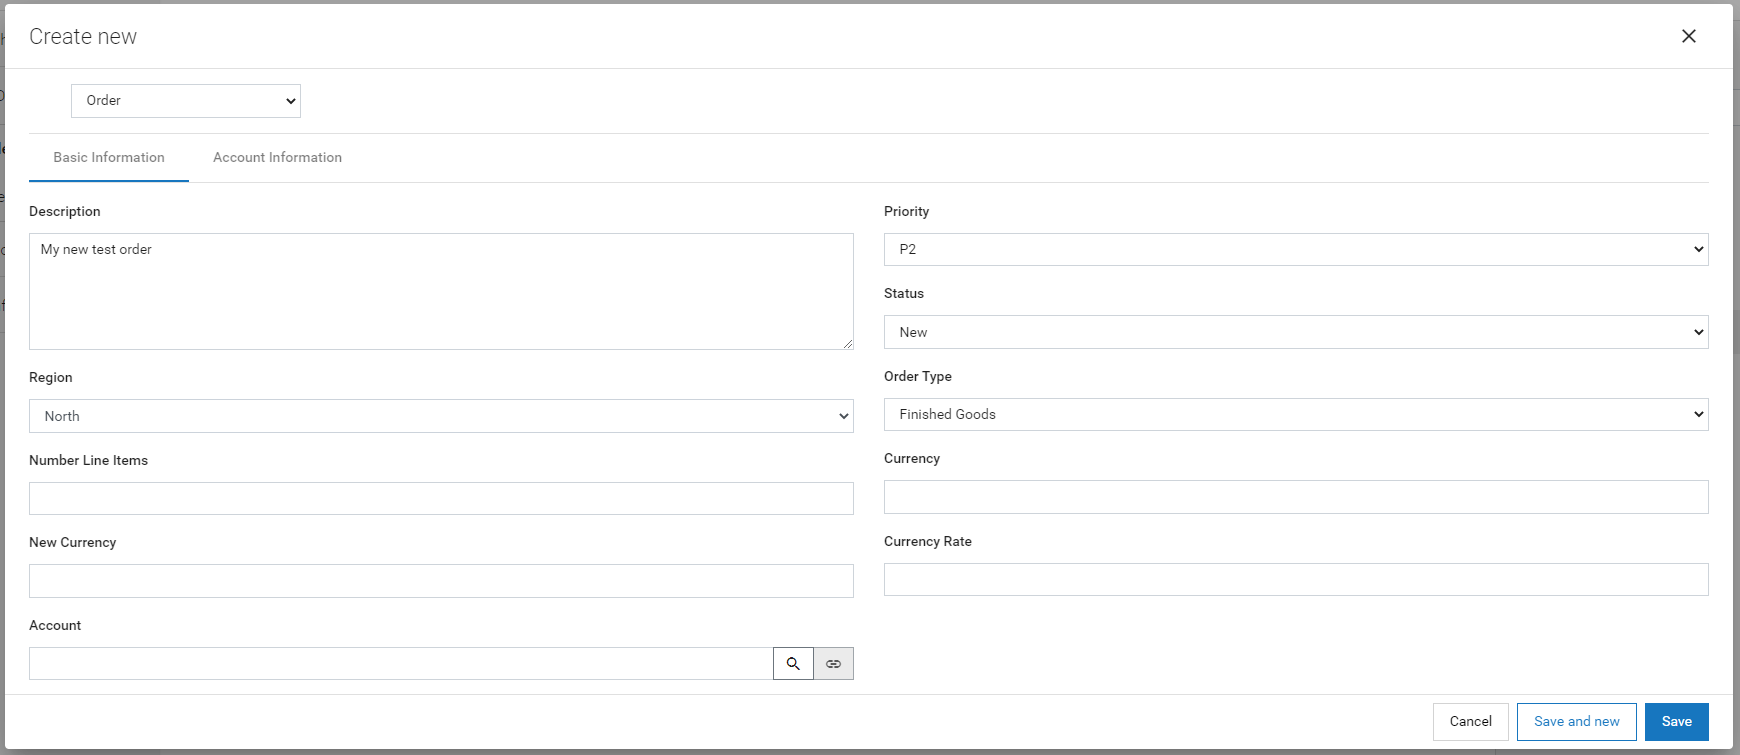
- For the Account field, select the magnifying glass icon to select an Account.
- Choose account Fred Supplies (that you created in a previous exercise).
- On the Create new Order page, click the Account Information tab to see that the fields have been populated based on the Account field.
- Save the new Order.
- Use the NEW LINE ITEM button to add three Line Items to the Order, as shown:
- Click on a line item and then click View Details, if the details are collapsed:
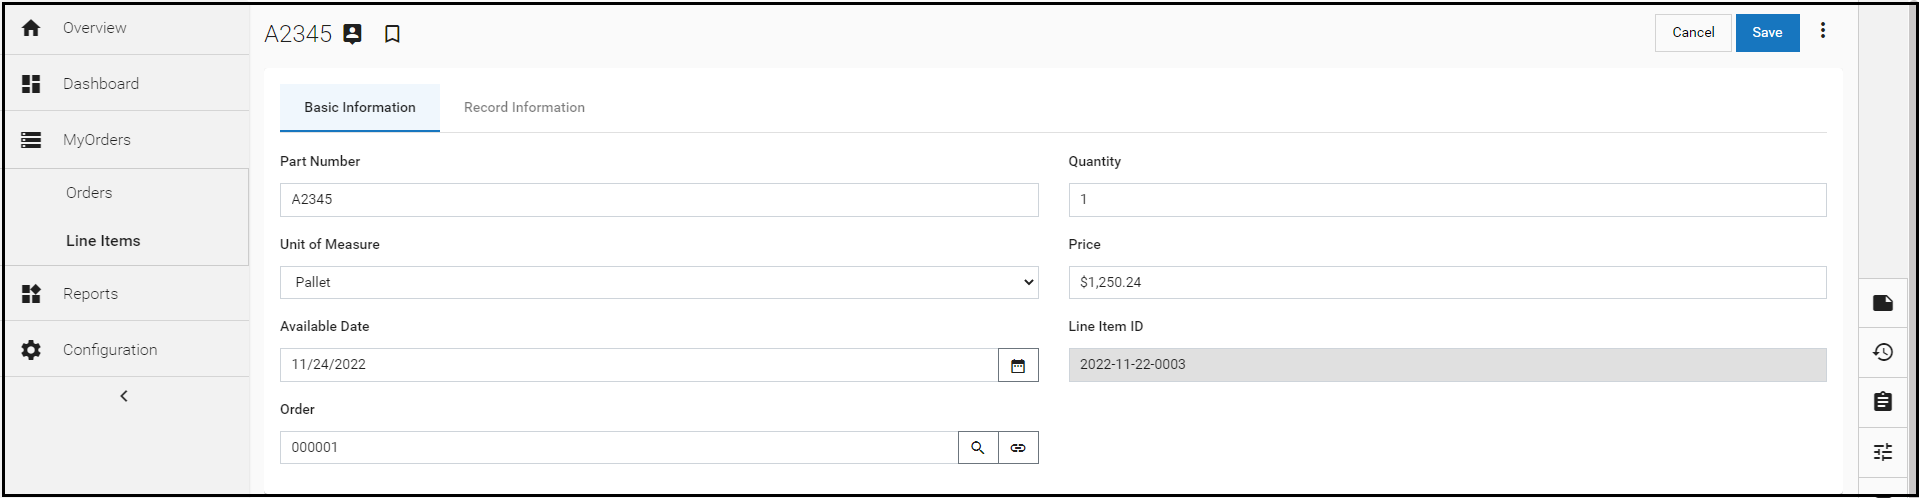
- Note: It would be useful to have a field that provides the total price for each line item (especially when the quantity is more than one).
- To update the Line Items Object to include a Total Price field that multiples the price and quantity for the line item:
- Go to the Configuration page, under the Customization, click Objects. Navigate to Line Items > Fields.
- Add a new field named Total Price with Display Type Formula, and Return Type Currency. For the Formula, multiply the Quantity field with by the Price field:
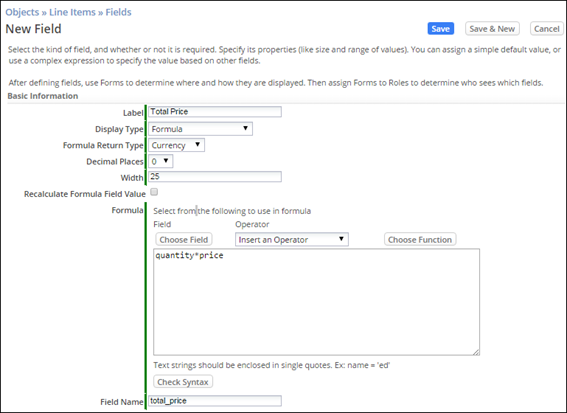
- Click Save.
- This field is automatically added to the Line Items default Form.
- Check the Line Items default layout:
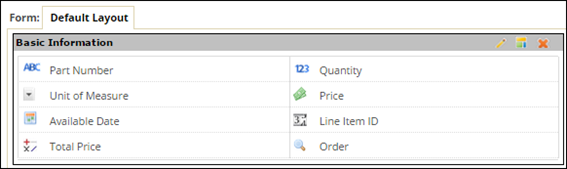
- Go to the Configuration page, under the Customization tile, click Objects. Navigate to Line Items > Forms > Default Layout.
- Move the Total Price field.
- Click Save Changes.
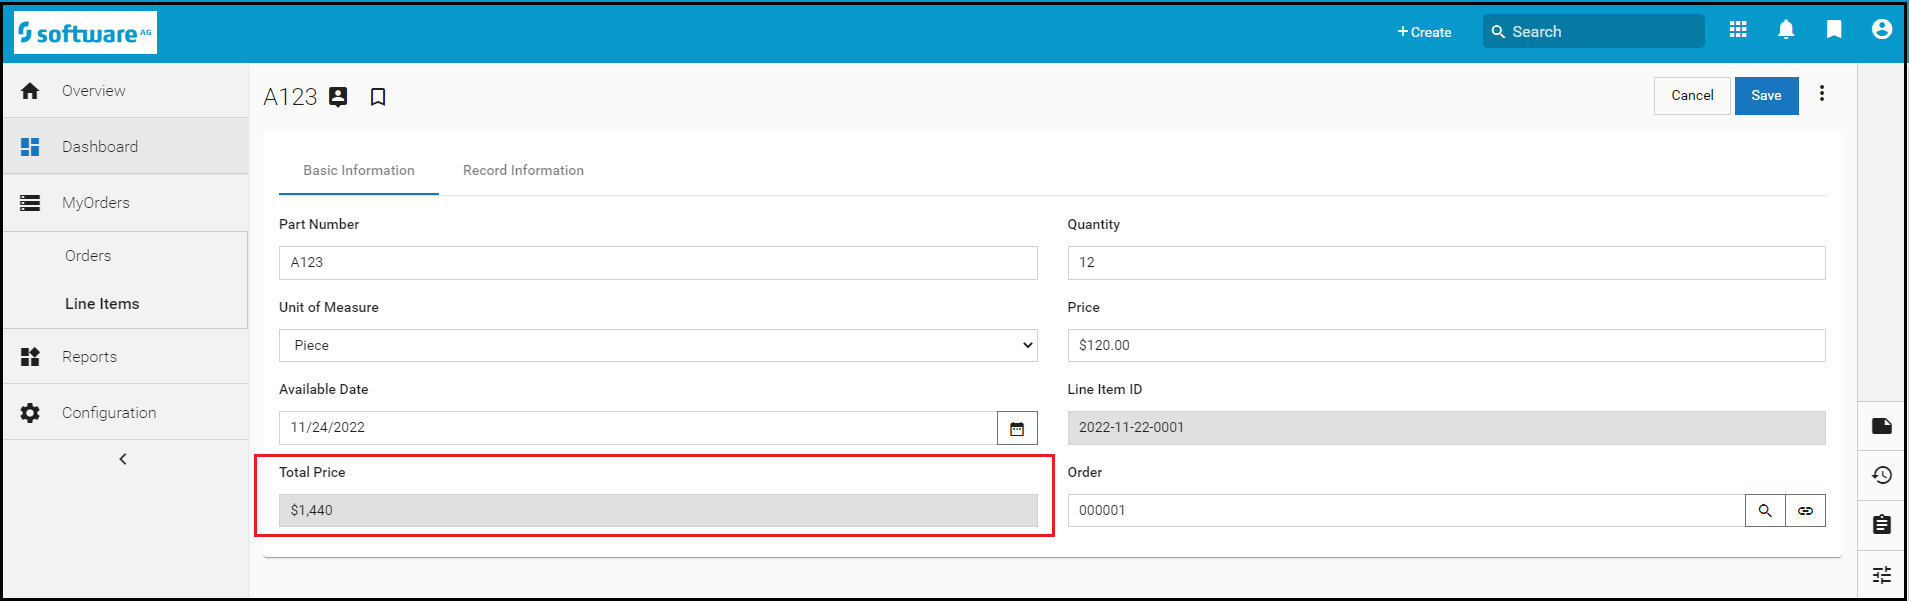
- To verify what the Agent User will see:
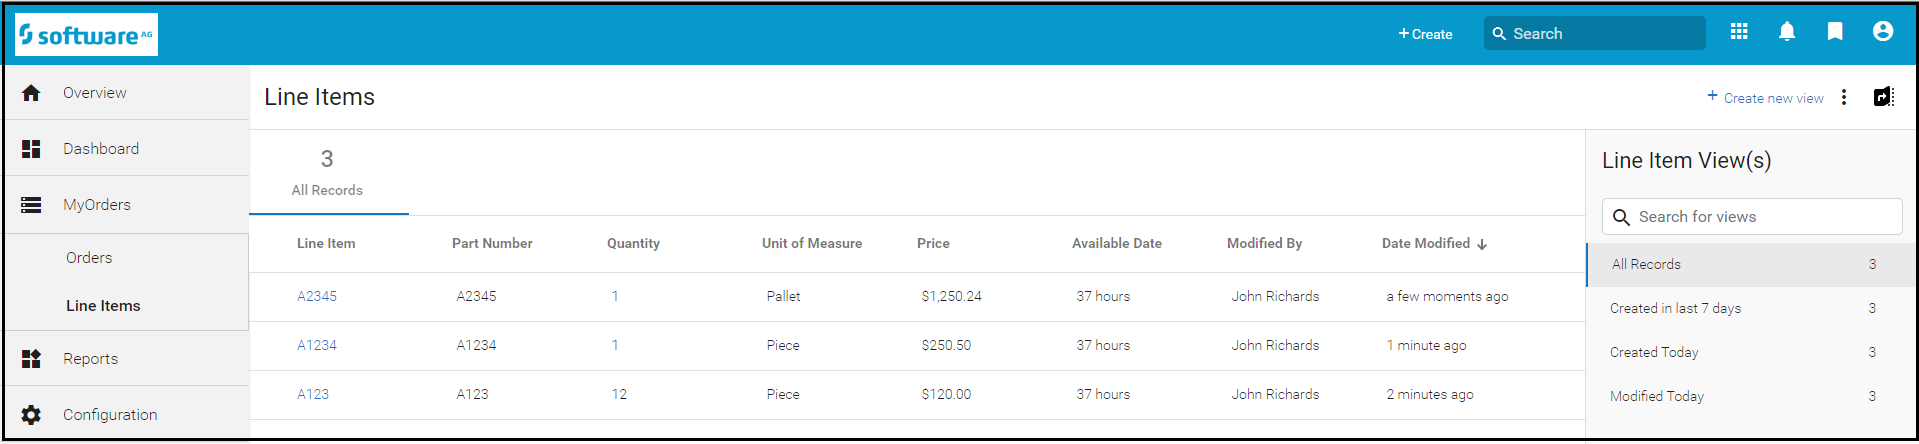
- Click the LINE ITEMS tab.
- Click the record for Part Number A123.
- Click View Details. The Form now shows the Total Price field, with the calculated value: