Web Forms
Designer > Data & Presentation > Objects > {object} > Web Forms
When you create a Web Form you can use it on on your corporate website, your intranet, or even a blog, and use it plug visitor data directly into a platform application.
Using Web Forms
In the Web Form, you specify the input fields you want to embed in an HTML page. You put the resulting form into the page, and that page is dynamically linked to your application.
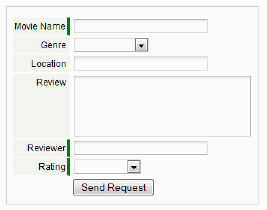 Generated Web Form

Fields in the Web Form are automatically validated according to the rules defined by the application, and you can generate an auto-response to the person submitting the form (using JavaScript), or redirect them to a specific URL using HTML. You can also notify designated members of your team that someone has submitted the web form.
Just follow the steps in the Web Form wizard to design and preview the form layout and begin collecting information.
- Considerations
- Web Forms can be disabled and enabled in the Object Information section of the Properties tab.
- Use Assignment Policies to automatically assign record ownership and trigger email notifications.
Best Practices
Here are some pointers to making web forms work for your business.
- Make sure you have a landing page for people to go to after they fill out the form, since in most cases it is their only confirmation that the submission was a success
- When someone fills in a form, you can automatically email a thank you to them if you include a field of type Email
- Likewise, you can alert a member of your team that someone has filled in the form with a notification - this is great for inquiries that need more interaction
- If you want to fully customize the layout of the form, use HTML snippets instead of the one-line JavaScript as the final format - it gives you more control to layout the form as well as style controls
- When using HTML snippets, you'll want to make sure you don't delete any INPUT tags marked HIDDEN or any embedded SCRIPT tags since these are what drive data into your application database
- If you include an Email field in the form, that object can be one you send email campaigns to - this makes registering for newsletters and other items very easy
With a Web Form, you can collect information from your company web site that directly flows into the platform. The Web Form Wizard helps you generate a customized HTML/JSP (JavaServer Pages) that you can embed into your web site.
Web Form Wizard
The wizard walks you through the process to create a web form.
Add a Web Form
To launch the web form wizard:
- Click Designer > Data & Presentation > Objects > {object} > Web Forms.
- Click the [Add Web Form] button, or open an existing web form. The web form wizard opens.
| Steps in the Wizard | Instructions |
|---|---|
| 1. Select Fields |
|
| 2. Mark Required Fields |
|
| 3. Notifications |
|
| 4. Auto Response | If an email address field was included in the web form, it is a good practice to create an auto response to acknowledge receipt of the web form information.
To send an auto response, complete the following information:
|
| 5. Save and Generate |
|
Copy and Paste
Whether the result is a Script or HTML, copy the generated code and paste it into your web page. [[Category:Template:Features]]