Difference between revisions of "Exercise 05: Building a Process Model"
From AgileApps Support Wiki
Wikieditor (talk | contribs) |
Wikieditor (talk | contribs) |
||
| Line 26: | Line 26: | ||
===Process Model Editor Tool Bar=== | ===Process Model Editor Tool Bar=== | ||
<br><br>[[File:PME_Tool_Bar. | <br><br>[[File:PME_Tool_Bar.PNG|800px]]<br><br> | ||
==Exercise== | ==Exercise== | ||
Revision as of 06:59, 22 December 2022
Introduction
Creating a Process
- A Process is a sequence of tasks or steps that need to be carried out�
- Every Process is part of an Object
- A Process cannot move across multiple Objects
- But a Process can cause a Process on �another Object to be launched�
- When designing a new application:
- First, build the data model (define Objects)
- Then design Processes
Process Models
- A Process Model is a graphical diagram that you build
- Defines the sequence of tasks or steps in the Process�
- Process Models can implement branching and joining Gateways�
- Created in the Process Model Editor
- A Process Model is a graphical diagram that you build


Note:
You must use Firefox or Chrome when using the Process Model Editor
Process Model Editor
- To create/modify a process model, drag & drop elements from the Shape Repository palette to the Process Model Editor
- Click the Check Syntax button in the Tools Bar before saving
- You cannot save if there is a syntax error
- Do a syntax check (and save) often!
- The syntax check finds lines that are not connected to a step (they can look right without actually being connected)

Process Model Editor Tool Bar

Exercise
In this exercise, you create a new Process Model - a diagram that defines the steps needed to process an order. You define Process model elements to automate the processing and control of the Orders Object. Here is the plan for the process flow:
- When a new Orders order is submitted by an Agent, automatically update the status of the order to Pending.
- Assign a task to the Agent (who created the order) to complete the order (for example, to add line items to it).
- When the Agent is finished with the order, assign the order to the Agent’s manager for approval.
- If the Manager:
- Approves the order, set the order status to Resolved.
- Rejects the order, send an email to the Agent requesting more information.

Important:
For this exercise - and any exercise where you use the Process Model Editor - use Mozilla Firefox or Google Chrome as your Web browser.
Steps
- Go to the Configuration page, under the Customization tile, click Objects. Navigate to Orders > Processes > New Process page.
- The Process Model Editor opens in a separate browser window:
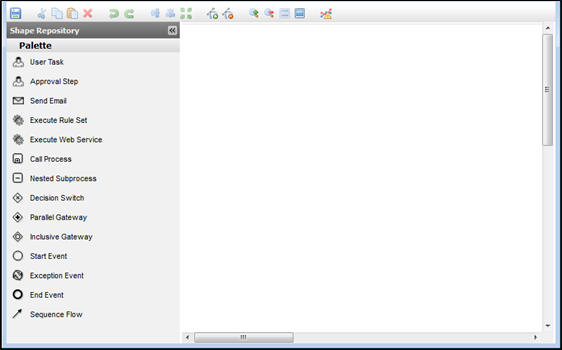
- Note: Starting the Process Model Editor may take a few seconds.
- The Process Model Editor opens in a separate browser window:
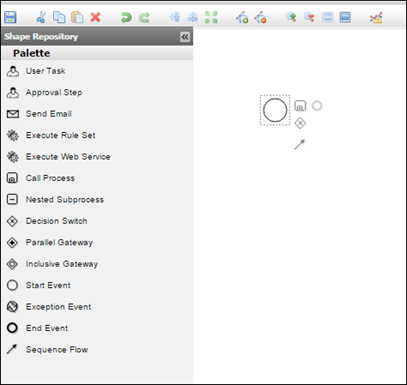
- Use drag & drop to add a Start Event step from the palette to the design canvas:
- To automatically set the order status to pending, add a step of type Execute Rule Set after the Start event.
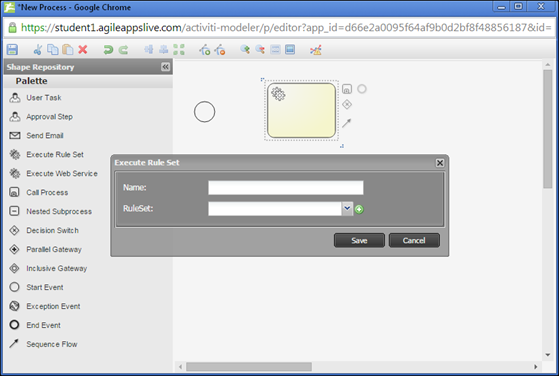
- Name the step Update Pending and click + to create a new Rule Set with the same name and with a description Change the status of the order to “pending”. Click Save.
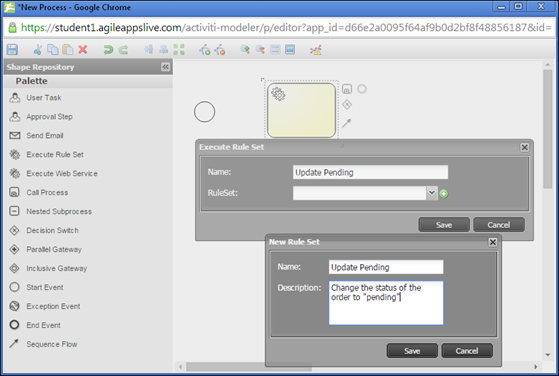
- Note: We will not implement the Rule Set and its Business Rules now. You will add this in a later exercise.
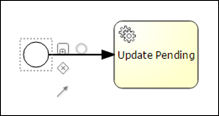
- Connect the Start Event step to the Execute Rule Set step by clicking the Start Event step and dragging its connector arrow to the Execute Rule Set element.
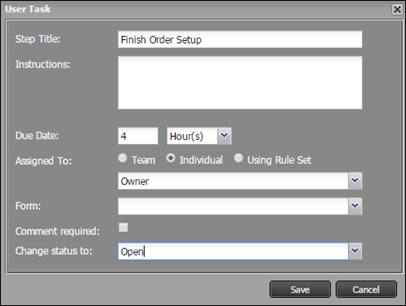
- Add a User Task step to the canvas. Name it Finish Order Setup, provide a Due Date of 4 hours, assign it to the Individual Owner, and specify Open for the Change status to option:
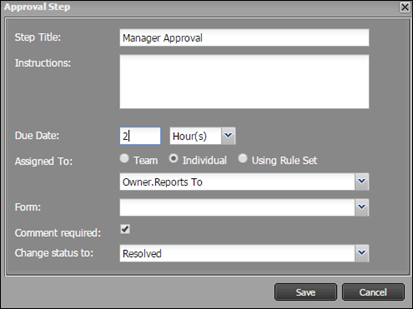
- Add an Approval Step to the canvas. Name it Manager Approval, provide a Due Date of 2 hours, assign it to the User’s manager by selecting the Individual Owner and Reports To for the Assigned to option. Check Comment required and set Change Status to to Resolved.
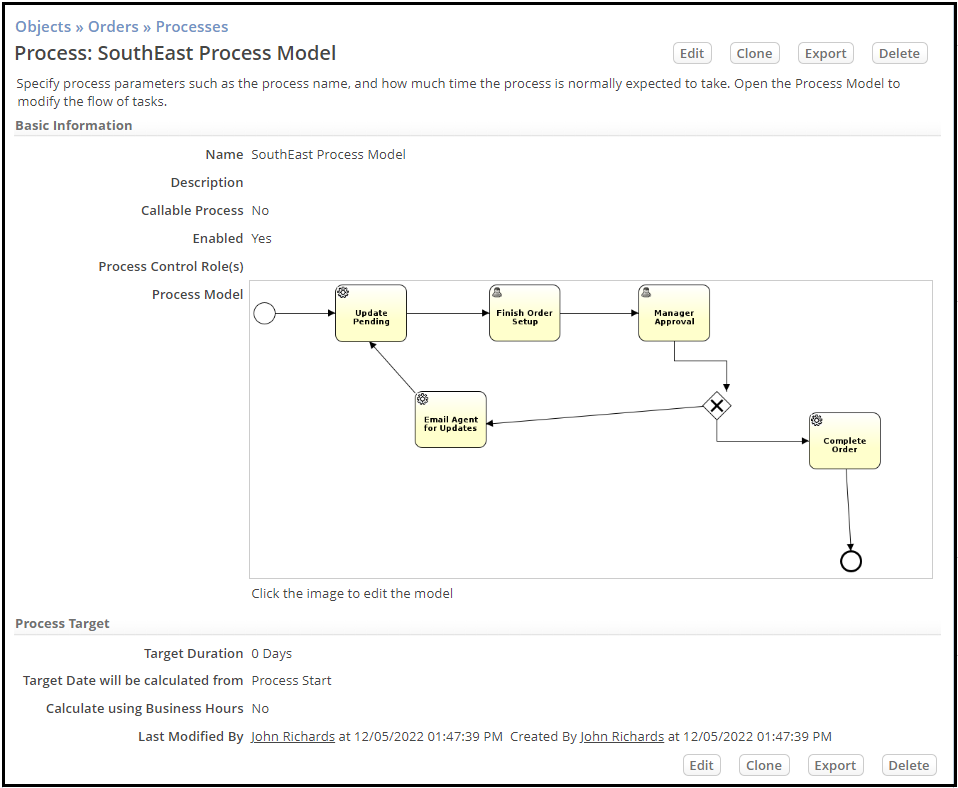
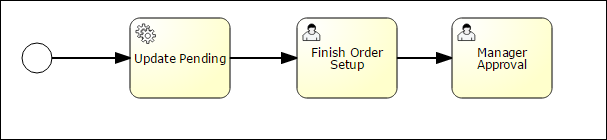
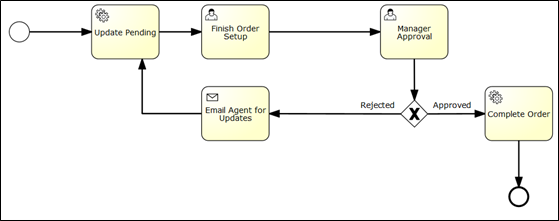
- Arrange and connect the steps so that your canvas looks as shown:
- It is good practice to save your work often:
- Since the Process Model will not be saved if there are any syntax errors, click the Check Syntax button to verify that there are no errors in your Process Model. You should see a message stating there are no errors:
- Note: If you get a message stating that there are syntax errors, you must resolve them before you continue.
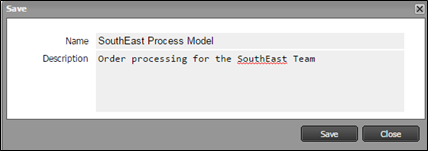
- Save the Process as SouthEast Process Model with a description:
- In case the process editor window was closed, click on a step in the process image to reopen the Process Model in its Process Model Editor and to continue with the exercise.
- Since the Process Model will not be saved if there are any syntax errors, click the Check Syntax button to verify that there are no errors in your Process Model. You should see a message stating there are no errors:
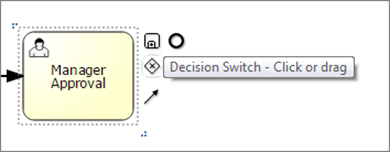
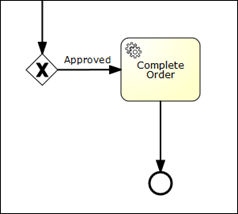
- After the Manager Approval step, add a Decision Switch to continue the process flow depending on whether the manager approves or rejects the order.
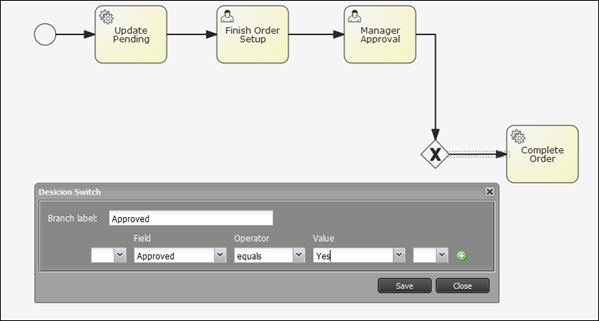
- Add another Execute Rule Set step named Complete Order for when the manager approves the order. When configuring the step, create another empty Rule Set called Complete Order on the fly with a description Change the status of the order to “closed”.
- Connect step Manager Approval to the Decision Switch.
- Connect the Decision Switch to the step Complete Order.
- Finally double-click on the connecting arrow leaving the Decision switch to open the Decision Switch dialog box. Configure the connection to be labeled as Approved with a branch condition of Approved equals Yes.
- Add an End Event step to the model and connect it to the Complete Order step:
- To define what happens if the manager rejects an order:
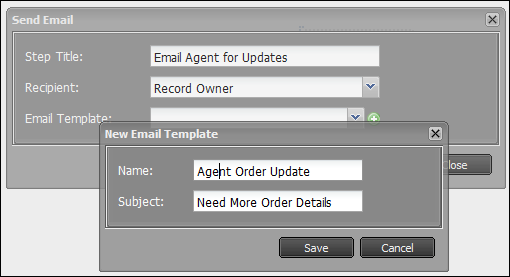
- Add a Send Email step to the left of the Decision Switch using the values shown. Name it Email Agent for Updates. Specify the Record Owner as Email recipient. For the Email Template, click + to create a new Email Template named Agent Order Update with a Subject Need More Order Details on the fly.
- Connect the Decision Switch to the Send Email step from above. Double-click on the connecting arrow to open the Decision Switch dialog box. Configure the connection to be labeled as Rejected with a branch condition of Approved equals No.
- Now complete the process flow by connecting the Send Email step back to the Update Pending step:
- Add a Send Email step to the left of the Decision Switch using the values shown. Name it Email Agent for Updates. Specify the Record Owner as Email recipient. For the Email Template, click + to create a new Email Template named Agent Order Update with a Subject Need More Order Details on the fly.
- Check the syntax and save the Process Model.
- As you save the Process Model for the second time, it will ask for a review comment.
- All changes are assigned to your SouthEast Process Model Process model.