Difference between revisions of "Part 4: Assign a Form to an Application Role"
From AgileApps Support Wiki
Wikieditor (talk | contribs) |
Wikieditor (talk | contribs) |
||
| Line 8: | Line 8: | ||
# For the '''Customer''' Role, change the '''Record Access Form''' from '''Default Layout''' to '''Customer Layout and leave Mobile Form unchanged:<br><br>[[File:Objects_Orders_Forms_Assignment.png]]<br><br> | # For the '''Customer''' Role, change the '''Record Access Form''' from '''Default Layout''' to '''Customer Layout and leave Mobile Form unchanged:<br><br>[[File:Objects_Orders_Forms_Assignment.png]]<br><br> | ||
# Click '''Save'''. | # Click '''Save'''. | ||
------------------------------------------------------------------------------------------------------------------------------------------------------------------------------------------------------------------------------------------------------------------------ | |||
:{| border="0" align="left" cellpadding="5" cellspacing="1" | |||
| | |||
[[Part 3: Add a Lookup field|Previous]] | |||
|} | |||
:{| border="0" align="right" cellpadding="5" cellspacing="1" | |||
| | |||
[[Part 5: Create a Web Form|Next]] | |||
|} | |||
Latest revision as of 10:54, 14 December 2022
In the part of the exercise, you clone the Default Layout Form and assign the new Form to an Application Role.
- Go to the Configuration page, under the Customization tile, click Objects. Navigate to Orders > Forms.
- Select the Default Layout Form and click Clone Layout.
- Name the Form Customer Layout, leave all other data unchanged and click Save.
- Remove the Priority and Status fields from the Form (just to make it different from the Default Layout Form) and click Save Changes.
- Go to the Configuration page, under the Customization tile, click Objects. Navigate to Orders > Forms Assignment.
- Click Edit.
- For the Customer Role, change the Record Access Form from Default Layout to Customer Layout and leave Mobile Form unchanged:
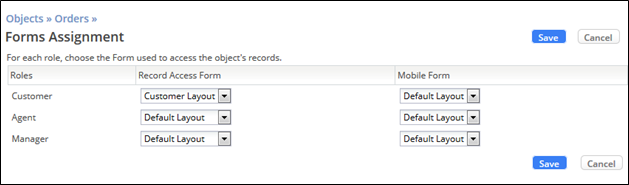
- Click Save.
