Difference between revisions of "Part 4: Export Data"
From AgileApps Support Wiki
Wikieditor (talk | contribs) |
Wikieditor (talk | contribs) |
||
| Line 4: | Line 4: | ||
## Specify/check your email address. | ## Specify/check your email address. | ||
## Uncheck '''Include All Data'''. | ## Uncheck '''Include All Data'''. | ||
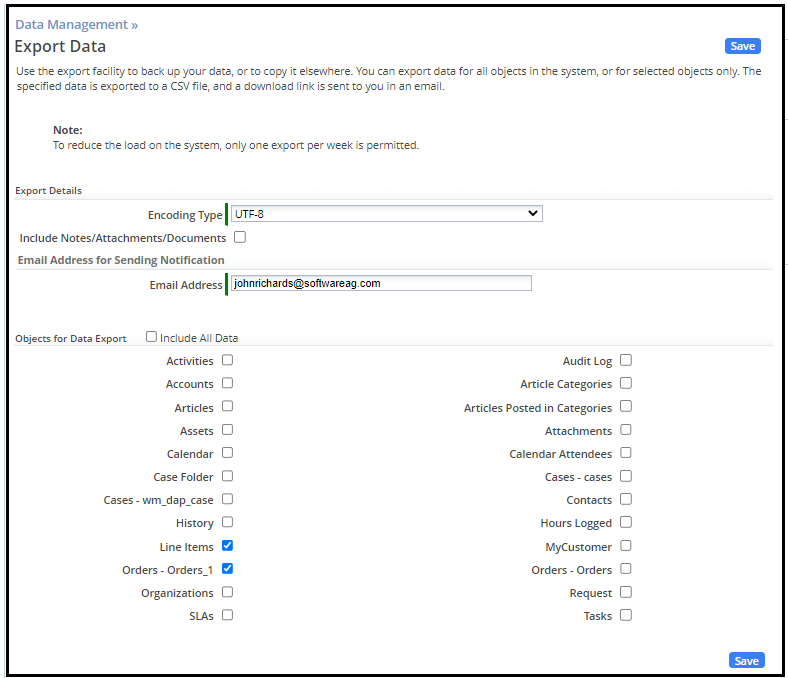
## Check the '''Orders''' and '''Line Items''' checkbox. | ## Check the '''Orders''' and '''Line Items''' checkbox.<br><br>[[File:Export_Data_Orders_Line_Items.PNG|800px]]<br><br> | ||
## Click '''Save'''. A success message appears: | ## Click '''Save'''. A success message appears:<br><br>[[File:Export_Status.png|800px]]<br><br> | ||
# To navigate to the '''Export Queue''', select '''Configuration''' > '''Administration''' > '''Monitoring''' > '''Export Queue'''. | # To navigate to the '''Export Queue''', select '''Configuration''' > '''Administration''' > '''Monitoring''' > '''Export Queue'''. | ||
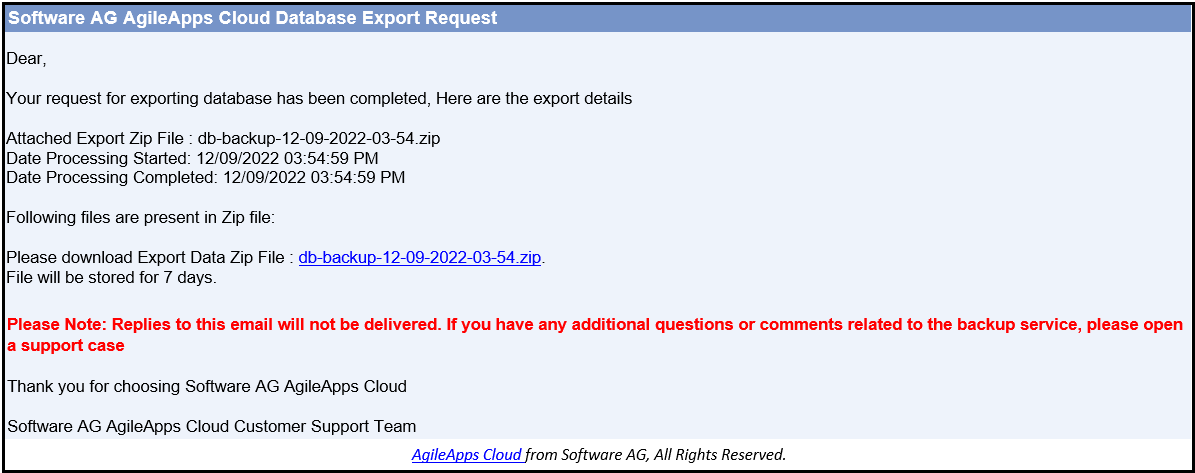
# Check your email inbox for the status update. | # Check your email inbox for the status update.<br><br>[[File:Db_backup.PNG|800px]]<br><br> | ||
# Click on the '''Export Data Zip File''' link in the email. Depending on your local configuration, the zip file will be opened or downloaded using a zip archive tool (for example, 7-Zip). | # Click on the '''Export Data Zip File''' link in the email. Depending on your local configuration, the zip file will be opened or downloaded using a zip archive tool (for example, 7-Zip).<br><br>[[File:Db_backup_files.PNG|800px]]<<br><br> | ||
# To open the file in Microsoft Excel: | # To open the file in Microsoft Excel: | ||
## Extract the '''Order.csv''' file from the zip file to your local file system. | ## Extract the '''Order.csv''' file from the zip file to your local file system. | ||
| Line 14: | Line 14: | ||
## In Microsoft Excel, on the '''Data''' tab, click the '''From Text''' option. | ## In Microsoft Excel, on the '''Data''' tab, click the '''From Text''' option. | ||
## Navigate to your extracted '''Order.csv''' file and click '''Import'''. | ## Navigate to your extracted '''Order.csv''' file and click '''Import'''. | ||
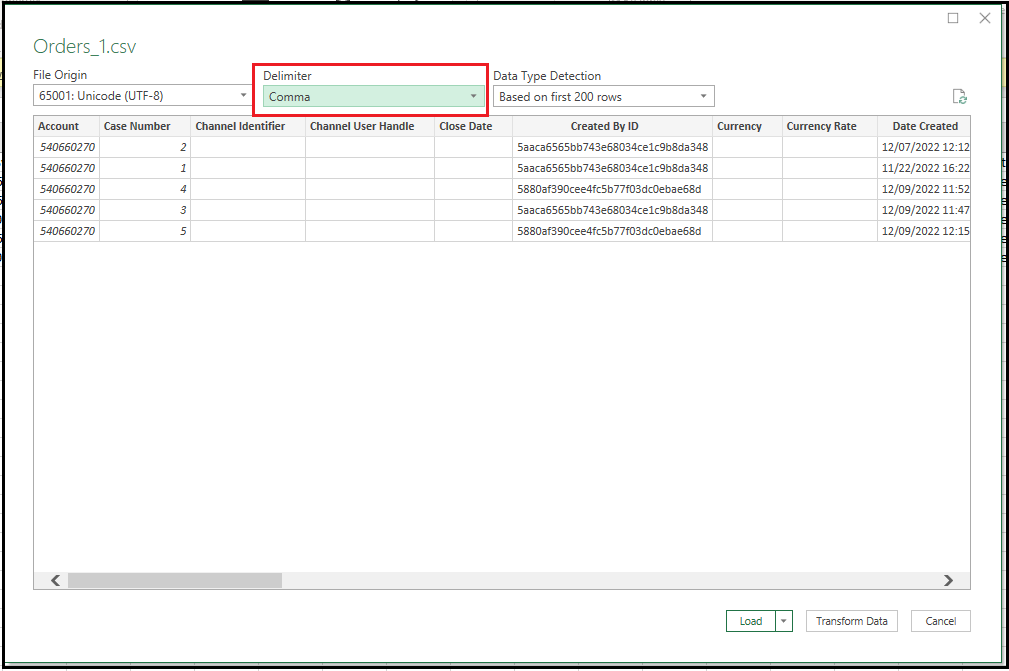
## In the '''Text Import Wizard''', select '''Delimited''' and click '''Next'''. Select '''Comma''' for the '''Delimiter''' and click '''Finish'''. | ## In the '''Text Import Wizard''', select '''Delimited''' and click '''Next'''. Select '''Comma''' for the '''Delimiter''' and click '''Finish'''.<br><br>[[File:Text_Import_Wizard.PNG|800px]]<br><br>[[File:Orders_CSV.PNG|800px]]<br><br> | ||
##: This file can be used as a source to generate records for import back to a webMethods AgileApps Cloud Object. | ##: This file can be used as a source to generate records for import back to a webMethods AgileApps Cloud Object. | ||
Revision as of 14:42, 11 December 2022
In this part of the exercise you export the test Order and Line Items records you created during the previous exercises in this course.
- Navigate to Configuration > Administration > Data Management > Export Data.
- On the Export Data page:
- To navigate to the Export Queue, select Configuration > Administration > Monitoring > Export Queue.
- Check your email inbox for the status update.
- Click on the Export Data Zip File link in the email. Depending on your local configuration, the zip file will be opened or downloaded using a zip archive tool (for example, 7-Zip).
<
- To open the file in Microsoft Excel:
- Extract the Order.csv file from the zip file to your local file system.
- Start Microsoft Excel (the following instructions assume you have MS Excel 2010 installed).
- In Microsoft Excel, on the Data tab, click the From Text option.
- Navigate to your extracted Order.csv file and click Import.
- In the Text Import Wizard, select Delimited and click Next. Select Comma for the Delimiter and click Finish.
- This file can be used as a source to generate records for import back to a webMethods AgileApps Cloud Object.


