Difference between revisions of "Web Services Integration"
imported>Aeric |
imported>Aeric |
||
| Line 64: | Line 64: | ||
#*: Provide an XML or JSON structure that exemplifies the one the service expects you to send. | #*: Provide an XML or JSON structure that exemplifies the one the service expects you to send. | ||
#*: The entries defined in the structure become the data-configuration parameters for inputs to the service. | #*: The entries defined in the structure become the data-configuration parameters for inputs to the service. | ||
#* '''Response''' | #* '''Normal Response''' | ||
#*: Provide an XML or JSON structure that exemplifies the one | #*: Provide an XML or JSON structure that exemplifies the one you receive. | ||
#*: The entries defined in the structure become the data-configuration parameters for outputs from the service. | |||
#* '''Error Response''' | |||
#*: Provide an XML or JSON structure that exemplifies the structure that is returned when an error occurs. | |||
#*: This entry is required ''only when the error-response structure differs'' from the normal response. (It would not be needed for the platform's [[REST APIs]], for example, because the platform's normal response always includes a result code and message.) | |||
#*: The entries defined in the structure become the data-configuration parameters for outputs from the service. | #*: The entries defined in the structure become the data-configuration parameters for outputs from the service. | ||
#Click '''[Process REST]'''<br>The samples you entered are processed to create the configuration screens for data interchange. | #Click '''[Process REST]'''<br>The samples you entered are processed to create the configuration screens for data interchange. | ||
Revision as of 00:25, 26 March 2014
About Web Services
A Web Service is basically a process that is standing by, waiting to do something for you once your program makes an internet connection and tells it what to do. The service might be to retrieve information or store it, perform a procedure on a remote server, take an order, or perform any other task that can be programmed.
A Web Service whose connections are specified using the Web Service Description Language (WSDL) can be integrated into the platform without programming, by performing a few configuration steps.
In addition, the interface defined by the WSDL can be simplified by the IT admin, so it more closely matches the application:
- Ignore fields that are not needed
- Hardcode data for fields whose values are fixed
- Create more friendly names for the remaining fields defined in the WSDL
- (For example, a web service that concatenates three fields ("field_1", "field_2", and "field_3") can be configured so that the designer sees it as a service which concatenates "first_name" and "last_name" to create "full_name", where "field_2" is hardcoded with a string that contains a single space.)
Those steps are covered below, under Configuring a Web Service.
Once done, an application designer can add a step in a Process to utilize the Web Service. The designer then uses the application-friendly names to:
- Map current record fields to and from WSDL input and output fields
- Specify fixed values or expressions for WSDL input fields
- Define expressions that operate on WSDL output fields and store the results in the record
The mechanisms are discussed further below, under Working with a Web Service.
Managing Web Service Configurations
Setting Up a SOAP Web Service
Start by uploading the WSDL file:
- Download the WSDL file for the service the application will connect to.
(Web Services managed by the WebMethods integration server are recommended.) - Go to
 > Developer Resources > Web Services
 - Click [New Web Service]
The SOAP tab is active, by default. - Do one of the following to read the WSDL file:
- Click [Select WSDL], browse to the folder that contains the file, and upload it, or
- Enter a URL in the text box and click [Download]
- In the form that opens, configure the service connection:
- Basic Parameters:
- Title - Required. Give the service a title. (Displays in the Name column of the Services list.)
- Operation - Required. Choose one of the operations defined in the WSDL file
- Version - Required. Enter text to identify the service version
- Service Parameters:
- URL - Optional. Use this field to point to a destination other than one defined in the WSDL file
- Username - Optional. Username required to use the service, when needed
- Password - Optional. Password required to use the service, when needed
- TTL - Optional. The "Time to Live", in milliseconds. (The amount of time the platform will wait before abandoning a request.)
- Click [Next]
Setting Up a REST Web Service
- Go to > Developer Resources > Web Services
- Click [New Web Service]
- Click the REST tab.
- Configure the service connection:
- Header Parameters
- Specify a comma separated list of parameters that will be specified as inputs to the service.
- When the HTTP resource is accessed, those values are included in the request header, rather than in the request body.
- For example, to access an AgileApps Cloud platform REST API, the header needs to include a session cookie, and it can optionally specify the data format to return (XML or JSON), so the header variables would be: Cookie,Accept.
- Content Type
- Specify the type of content that will be sent to the service (XML or JSON).
- The same type of data should used when entering sample Request and Response data in the sections that follow.
- URL
- Specify the URL for the REST resource.
- Note: For a service that requires an initial login, you'll need to set up two services: One for the login resource, and one for the data resource you intend to access.
- HTTP Method
- Specify the HTTP request type: GET, POST, PUT, or DELETE.
- By convention, GET fetches data, POST adds data, PUT replaces data, and DELETE removes it.
- Request
- Provide an XML or JSON structure that exemplifies the one the service expects you to send.
- The entries defined in the structure become the data-configuration parameters for inputs to the service.
- Normal Response
- Provide an XML or JSON structure that exemplifies the one you receive.
- The entries defined in the structure become the data-configuration parameters for outputs from the service.
- Error Response
- Provide an XML or JSON structure that exemplifies the structure that is returned when an error occurs.
- This entry is required only when the error-response structure differs from the normal response. (It would not be needed for the platform's REST APIs, for example, because the platform's normal response always includes a result code and message.)
- The entries defined in the structure become the data-configuration parameters for outputs from the service.
- Header Parameters
- Click [Process REST]
The samples you entered are processed to create the configuration screens for data interchange.
Configuring the Data Interchange Parameters
In this part of the setup process, you can simplify the service's data parameters for process designers.
Start by mapping input fields (fields going to the service):
- In the hierarchy of fields that appears, click the [-] icon to collapse a section, click [+] to expand it.
- For each input field, choose one of:
- Ask for Mapping -
- Friendly Name - Give the WSDL field a name the application designer will recognize
- Ignore - Ignore this value
- Hardcode - Provided a hardcoded value for the field. (The application will never even see it.)
- Username - Supply the Username value defined in the initial configuration step ($username).
- Password - Supply the Password value defined in the initial configuration step ($password).
- Click [Next]
Then map output fields (fields coming from the service):
- In the hierarchy of fields that appears, click the [-] icon to collapse a section, click [+] to expand it.
- For each output field, choose one of:
- Ask for Mapping - Ask the designer to supply the name of a record field to store the value into.
- Friendly Name - Give the WSDL field a name the application designer will recognize
- Ignore - Ignore this value
- Click [Save]
The Web Service is now ready for use by an application designer.
Viewing and Modifying a Configuration
- Go to > Developer Resources > Web Services
- Click the Service name
- Click [Details]
- Follow the steps described in the previous section to view the configuration and make changes.
Adding a New Version
- Go to > Developer Resources > Web Services
- Click the Service name
- Click [Add New Version]
- Follow the steps described earlier to add another version of the service.
(Be sure to provide a value in the Version field.)
Testing a Service
- Go to > Developer Resources > Web Services
- Click the Service name
- Click [Test Service]
- Provide input values.
- Click [Execute]
- Output values are displayed
Working with Web Services
Invoking a Web Service in a Process
Once a Web Service has been configured, you can add it as a step in a Process:
- Go to > Objects > {object} > Processes
- Create a new process, or select an existing one and click the flow diagram to edit it.
The process model editor opens. - From the palette, drag the element to Execute Web Service into the model
- Fill in the parameters for this process step:
- Name - Give the step a name
- Web Service - Select one of the Web Services configured for the application
- If the service has a version identifier, it is displayed following the service name
- For example: Some Service [Version 2]
- Input Mapping - For each field that goes to the service, choose one of the following, and then choose the WSDL field that the value goes into, from the list of friendly names defined in the Web Service configuration:
- Use Object Field - Select a field from the current record
- Use Fixed Value - Define a fixed value
- Use Expression - Create an expression based on record fields. When the dialog opens:
- Click Field to select a field in the record, or in a record referenced by a Lookup
- Click the dropdown to select an operator
- Click Function to select a Function
- Click in the text area to enter a value
- Click [Insert] to insert the result into the mapping field
- Output Mapping - For each field that comes from the service, choose one of the following, and then choose the record field to store the value in:
- Use WSDL Field - Select a WSDL output field from the list of friendly names defined in the Web Service configuration.
- Use Expression - Create an expression based on WSDL fields. When the dialog opens:
- Click Field to select a WSDL field
- Click the dropdown to select an operator
- Click Function to select a Function
- Click in the text area to enter a value
- Click [Insert] to insert the result into the mapping field
- Click [Save]
When the process reaches this step, the Web Service is automatically invoked, and the specified data interchange occurs.
Logging In to a Web Service
Some Web Services require a separate log-in step before resources can be accessed. That behavior is typical of REST services, and applies to some SOAP services, as well.
For such services, create a two-step process:
- The first step invokes the service's log-in resource
- The second step invokes the data-interchange resource
The trick is to capture the login-verification data returned in the first step as one or more Process Variables, and use it in the subsequent step.
Example: Logging in with the AgileApps Cloud platform REST API
The AgileApps Cloud platform login resource returns the current session ID as a parameter. That value needs to be included in the session cookie when a REST resource is accessed. This example shows how the task can be accomplished.
The data structure returned by the login resource looks like this in XML:
- <platform>
- <login>
- <sessionId>...(ID value)...
- <login>
So the path to that value in the returned data structure is platform.login.sessionID
Here, an expression is created using that value, in the form it will be needed next (JSESSIONID=123456789):

The expression created in the login step is then included in the cookie header parameter when accessing a data resource:

Invoking a Web Service From a Rule
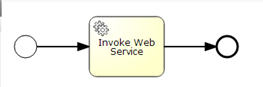
- Create a Process that invokes the web service, like the one shown here:
- (If needed, add an initial step that invokes the service in order to log in.)
- Create a Process that uses the Process Model.
- Launch the Process from a Rule

Invoking a Web Service using an API
- Create a Process that invokes the web service, like the one shown above.
(If needed, add an initial step that invokes the service in order to log in.) - Create a Process that uses the Process Model.
- Create an Event Rule that launches the process.
- In the code that is using the REST or Java API, trigger the event to launch the process.