Calendar
Workspace > All Items > Calendar
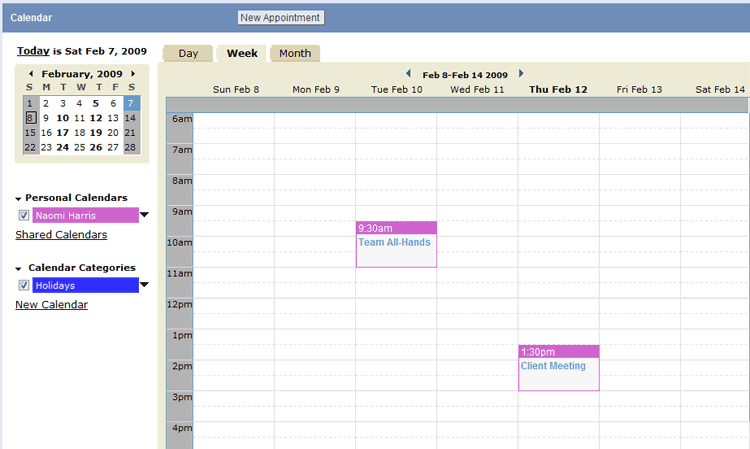
A calendar displays Appointments. An appointment can occur only once, or be a recurring event. Unlike Tasks which need not specify a time, all appointments include both a start time and end time.
The Calendar tool provides features that let you:
- Create one or more personal calendars and perform all the standard actions
- add appointments
- invite others
- send email reminders
- other activities
- Share your calendar with other team members, and vice versa
- Create calendar categories for special events (such as Holidays, projects, or Marketing Events), to provide additional calendar appointment layers
- Publish your calendar by integrating it into a web page
Delete a Calendar
- In the Calendar tab, click the down-arrow next to the calendar you want to delete.
- Choose Delete this Calendar from the drop-down menu that appears
You cannot delete your personal calendar because it is the default calendar.
The appointments it contains are removed from your calendar. (But they remain intact available for viewing by the calendar owner.)
Respond to a Calendar Invitation
When you add an appointment to your calendar, you can invite the person designated as the Contact, or extend an invitation to others. When you and/or the email recipients receive the email notification, you can RSVP to the invitation, as well as add it to your Calendar in Microsoft Outlook.
To respond to the mail invitation:
- Open the email from mailservice@yourdomainname.com
- Click RSVP to this invitation
- A new email message opens, addressed to the designated Contact, with the appointment title included as the Subject line
- Type a text message and send the email response to the invitation
About Calendar Categories
The default calendar is named My Calendar, which is associated with the User that is logged in.
- Additional calendars can be created
- These calendars are displayed in the Calendar Categories section on the Calendar page
- A maximum of 10 additional calendar categories can be created
- A calendar can be published to the web when the Allow Web Publishing option is enabled
- In Reports based on Tasks and Appointments, the Calendar Category is available as a field
Adding a Calendar Category
To add a Calendar Category:
- Open a Calendar
- In the Calendar Categories section, click the New Calendar link
- In the Calendar Information section, complete the following information:
- Calendar Name
- Name of the calendar
- Allow Web Publishing
- When checked, this calendar can be made public and formatted for publishing to a web page
- In the Visibility Control and Sharing section, complete the following information:
- Select a Share With option for which you'll specify permissions:
- Everyone
- Share with all Users, Teams and Roles
- User
- Share with select Users
- Team
- Share with select Teams
- Role
- Share with select Roles
- For each Share With candidate, specify the Access Rights:
- View Only
- View reserved time slots and meeting details
- View and Add
- View reserved time slots and meeting details. Add and modify Calendar items.
- Administrator
- View, add, and modify Calendar items. Modify Calendar settings.
- Click the [Add] button to create additional control and sharing permissions using the steps above.
- Click [Save]
- Select a Share With option for which you'll specify permissions:
Edit Calendar Settings
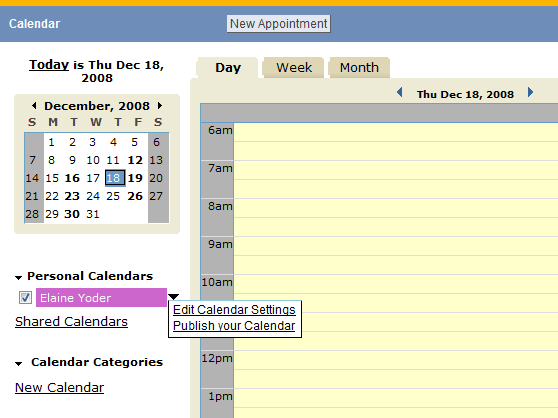
- In Calendar Categories, click the arrow next to the desired calendar
- Choose Edit Calendar Settings
- In the Update Calendar page, update the options under Calendar Information and Visibility Control and Sharing, as necessary
- Click [Save]
Sharing calendars provides the ability to add appointments and assign them to other team members, view all appointments in a shared calendar, or view appointments for just selected team members.
To add a shared calendar:
- In the Calendar tab, click the Shared Calendars link
- In the Lookup window, select a team member
- Repeat step 2 to add other members of your team
The new calendars are automatically selected so that you can view their appointments.
Publish a Calendar
You can publish your own personal calendar to the web, as well as other calendar categories that you create.
To publish a calendar to the web:
- In Calendar Categories, click the arrow next to the desired calendar
- Choose Publish your Calendar
- Copy and paste the link into a web page.
- Click [Done]
The calendar you published will appear on that web page.

