Creating a Mobile Application
Overview
You can build many applications on the AgileApps platform and publish them as native mobile applications. By publishing the applications built on the AgileApps platform as mobile applications, you can extend the reach of these applications. The mobile applications you create, support both Android and iOS platforms. You can publish these mobile applications on the Google Play Store or on the Apple App Store.
Actors
Any user who has the Manage Applications permission can create these mobile applications. For more information about this permission, see Manage Applications permission.
Before you begin
You need to meet the following prerequisites before you create the mobile applications:
- The AgileApps platform should have the ability to create mobile applications from the applications built on the platform.
- The platform should support both Android and iOS platforms.
- The supported operating system versions are:
- Android - 7.0 and later
- iOS - 10.0 and later
- Configure the application build server.
Basic Flow
This section explains the basic flow for the following:
- Creating a mobile application
- Editing a mobile application
- Deleting a mobile application
Creating a mobile application
This process assumes that you have already created an application using the AgileApps platform. For information on creating applications in the AgileApps platform, see Application Construction Wizard.
You are now creating a mobile application for this same application.
- 1. Log into the AgileApps application.
- 2. Select
 from the left navigation panel.
 - 3. Click
 from the upper-right corner of the Mobile Applications screen.
 - 4. On the Application Name screen, provide the following details:
- a. Application Name – This is a unique name across each tenant. Under a single tenant you cannot have two applications with the same name.

Note: You cannot change this name once you save this form.
- b. Description – Provide a brief description for the application.
- c. Version – Provide a version number. This version number is expressed in major.minor.patch format. For example, 10.11.2, where 10 is the major version, 11 is the minor version, and 2 is the patch number.
- d. Author Name – Provide an author name. This name could be of a user, team, or an organization.
- e. Icon – Set an icon for the application you are creating. Click
 to upload an icon. If you do not upload an icon, the application uses the default icon
  .
.
-
Note: Currently, the application supports only .PNG format images. Minimum image dimension should be 1024x1024 pixels.
- f. Splash – Set a screen to show on your mobile device while the application is loading. If you do not set a splash screen, the application uses the default splash screen.
-
Note: Currently, the application supports only .PNG format images. Minimum image dimension should be 2732x2732 pixels.
- g. Theme – Set a theme for the application that you are creating. Currently, a default theme is available for the application that you create.
- 5. Click Save to save the changes.
- 6. In the Build section, provide the following details to package the application:
-
Note: AgileApps does not store any of the details that you provide. For example, data like certificates, keystore files, and passwords are deleted after creating the build.
- a. For Android:
- i. Alias – Enter an alias to build the application. This alias is available in your keystore file.
- ii. Keystore file – Provide a keystore file that is associated with the above alias.
- iii. Keystore Password – Provide the password to access the keystore file.
- iv. Alias Password – Provide the password for the alias.
- v. Click Build to build the application package. The system displays the message Build is in progress.
- vi. On success, you will see the message Last build is successful. Click Download to download the .apk package file.
- a. For Android:
-
Note: On failure, you will see a corresponding message.
- b. For iOS:
- i. Provisioning Profile – Enter the details for the provisioning profile that you have received from Apple for creating applications for the App store.
- ii. Certificate File – Provide the certificate details which is of .p12 file format.
- iii. Certificate Password – Enter the password for the certificate.
- iv. Click Build to build the application package. The system displays the message Build is in progress.
- v. On success, you will see the message Last build is successful. Click Download to download the .ipa package file.
- b. For iOS:
-
Note: On failure, you will see a corresponding message.
- 7. Select Build All to build all the applications together with a single action. If a build is in progress, this button is not enabled.
- 8. Select Download All to download the package for all the applications together with a single action. If a build is in progress or if either of the packages is not available, this button is not enabled.
Editing a mobile application
You can edit a mobile application from the mobile application dashboard page.
- 1. Log into the AgileApps application.
- 2. Select from the left navigation panel.
- 3. On the Mobile Applications dashboard page, you will see a list of all the mobile applications that are available under your tenant profile.
-
Note: To search for an application, type the name of the application in the Search Application box adjacent to
.
- 4. Select the application you want to edit and click the ellipses icon as shown in the following image:
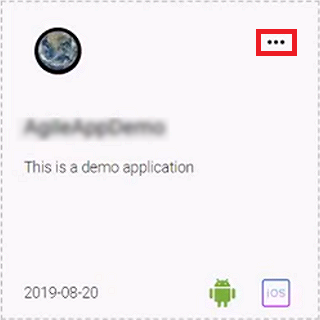 .
.- 5. Click Edit and make the required changes.
- 6. Click Save.

Deleting a mobile application
You can delete a mobile application from the dashboard page.
- 1. Log into the AgileApps application.
- 2. Select from the left navigation panel.
- 3. On the Mobile Applications dashboard page, you will see a list of all the mobile applications that are available under your tenant profile.
-
Note: To search for an application, type the name of the application in the Search Application box adjacent to
.
- 4. Select the application that you want to delete, and click the ellipses icon as shown in the following image:
- 5. Select Delete.
- 6. In the Confirm deletion dialog box, click OK.