Working with Cases
Case Agents will spend the majority of their time working with Cases. This article shows how to perform the most common actions.
Creating a Case
When viewing a case list, the [New Case] button is conveniently at hand:
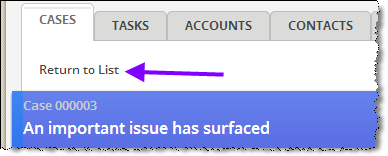
When viewing a case list, use Return to List to get back to where that button is displayed:
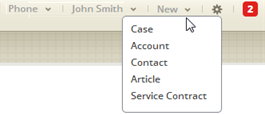
Or use the New (record) dropdown from the top of the page:
Assigning a Case to a User or a Team
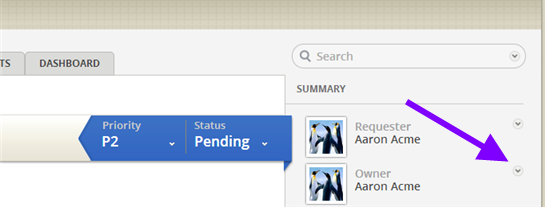
Clicking on the arrow next to the owner shows the person who currently owns the case.
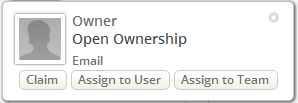
A popup appears showing the details of the current owner, if there is one. In the example shown here, the case has no owner:
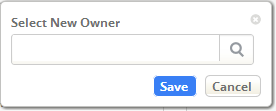
You can then choose to claim the case yourself, assign it to another individual, or assign it to a team. When you choose an assignment option, a selection dialog appears. For example, here's the dialog you see when you click [Assign to User]:
Click the magnifier icon to select a record from the list of users. If you have typed any characters, only users whose names contain those characters will be shown.
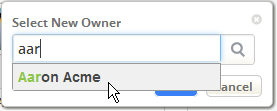
For an even easier time, type three characters from the user's name, and wait a second. A list appears showing people with those names:
You can now select someone from that list.
Respond to a Case or Add a Note
In the heading of a case, you can choose to see more detail or add a comment:
When you click in the Reply or Add a note block, the message box appears:
In addition to the icons that appear at the top of the message box, a variety of Keyboard Shortcuts can be used when editing the message.
Other options appear at the bottom of the message box. Starting from the right:
- Use the Email setting to send an email to the person who submitted the case
- This is the default setting.
- The note you send automatically becomes part of the case, along with any responses that come back
Note: By default, the list of recipients includes all participants in the case, including the original requester. In the GUI, you can deselect participants to determine who a message is sent to. When someone responds to a message in their email client, the message is copied to all participants in the case (including the original requester).
- Use the Private Note setting to add a comment that is visible only to other case workers.
- Use the Quick Text feature to insert saved snippets of text into the message
- Use [Add Recipient] to copy others
- Recipients are considered collaborators on the case
- They automatically become "followers", and are copied on all future developments
- Use [Attach File] to include an attachment (one per comment)
- When done, click [Add Note] to add the note to the case and send it to any designated recipients
Changing Case Priority and Status
You can can change many attributes of a Case when you click View Detail. But priority and status are the values you will probably modify most frequently. Those values can be changed using the convenient drop down lists in the upper right corner of the case:
To learn more about the possible states and the transitions between them, see Case States and Transitions.
Completing Tasks
Completing Tasks helps a team collaborate to move a Case forward to closure. Tasks can created manually, or they can be generated automatically by Processes or SLAs.
- Learn more: Working with Tasks
Taking Other Actions
Viewing Customer Details / Creating a New Contact
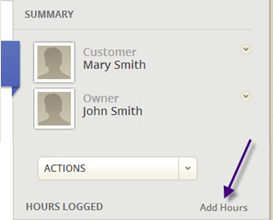
At the right is the Case Summary, showing who submitted the case, and who currently owns it:
Clicking on the arrow next to the submitter brings up submitter details stored in the case:
If the submitter is not yet known to the system, [Convert to Contact] is displayed, in place of [Contact Details]. Use that button to easily create a Contact record when someone new submits a case.
Logging Hours
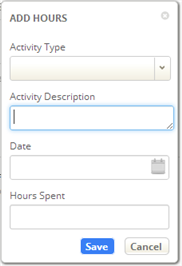
To track the time spent on a case, click Add Hours below the summary:

