Registering your Application in the External Mail Server
Using Gmail as your Mail Server
Before you configure your mailbox settings on AgileApps Client, perform the following steps to register your application in the Google Mail Server.
Registering your Application in the Google Mail Server
You must register your application in the Google Mail Server as an OAuth Client. You must create a project prior to performing the application registration process.
- Go to Google Developer Console.
- Select the email address you have registered for the external Mailbox and enter the password.

- Click the Select a project drop-down, and then click New Project.
- On the New Project window, enter the desired project name in the Project name field.
- Click CREATE.
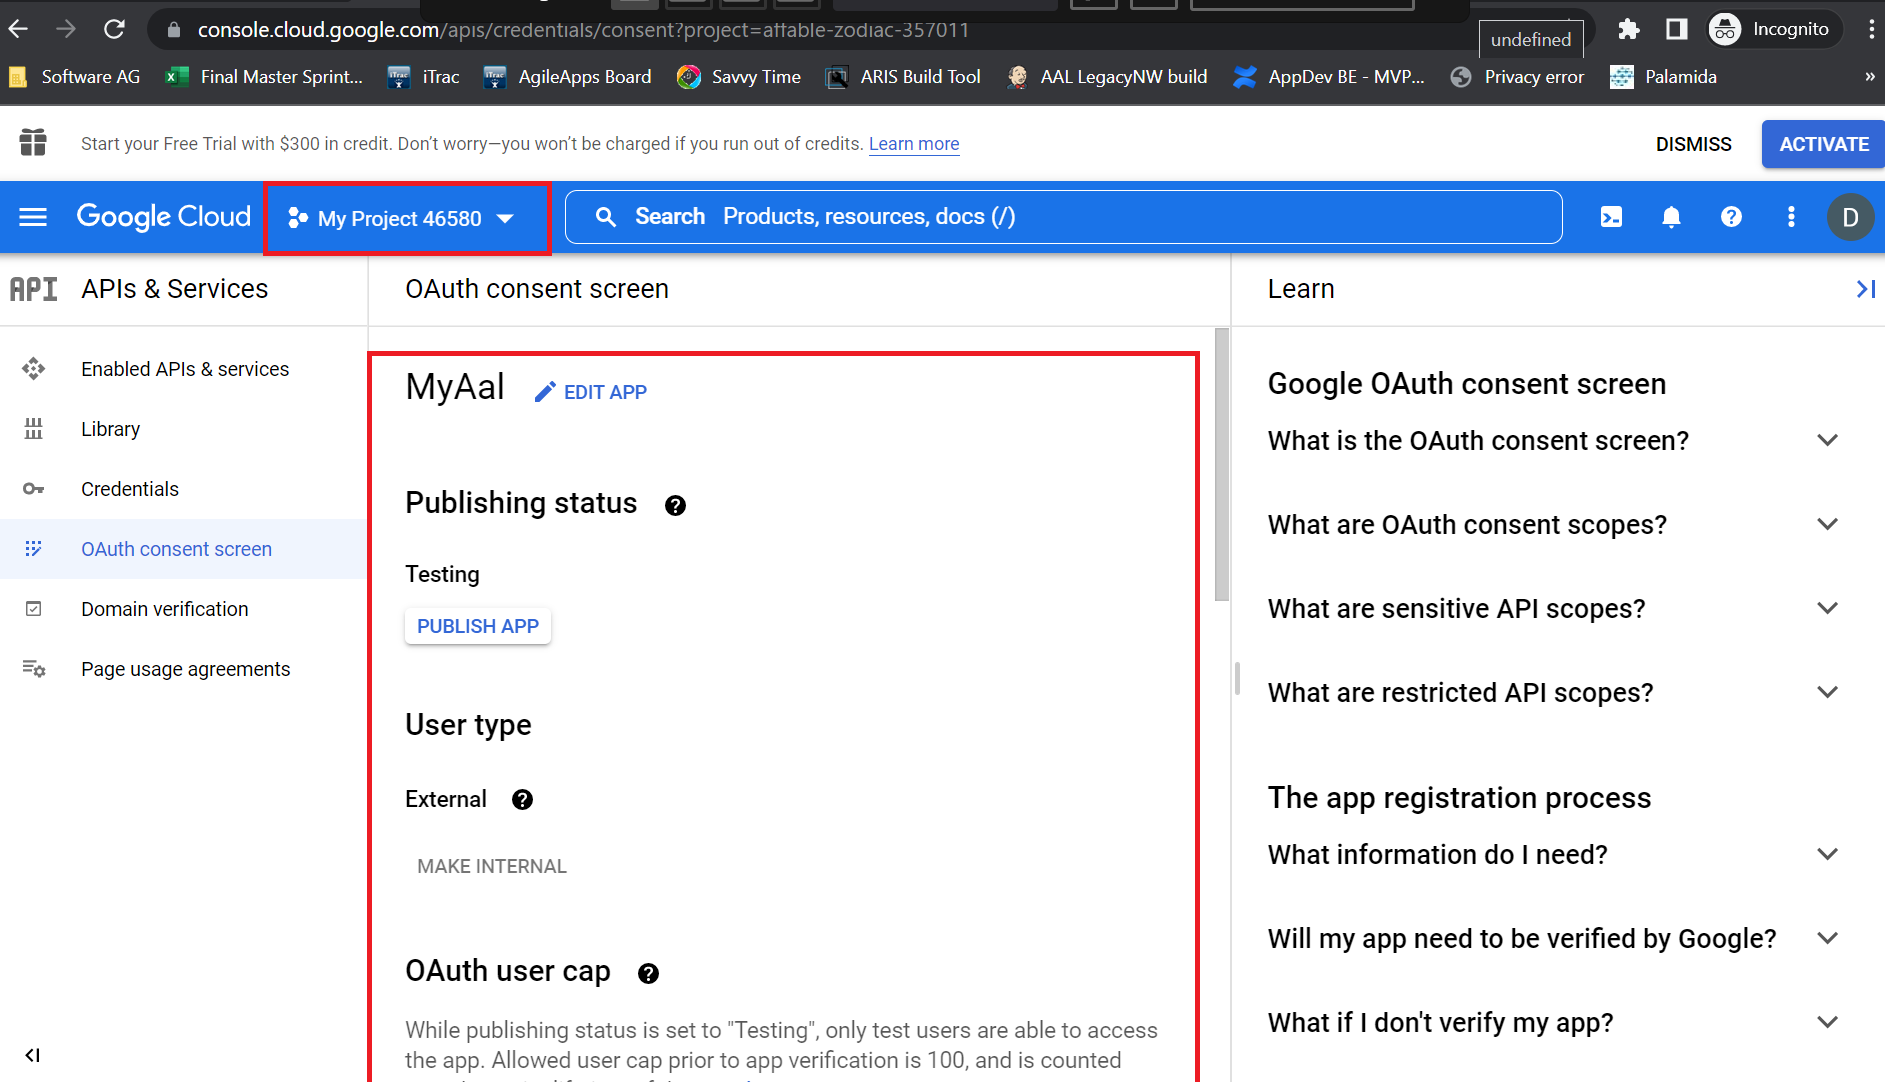
- On the left sidebar, click APIs and services > OAuth consent screen.
- Select the External option, and then click CREATE.
- On the Edit app registration page, enter the following details:
- App Information
- App name: Enter the application name you want to register.
- User support email: Enter the email address you have registered as the external mailbox.
- App logo (optional): Upload the desired application logo. Allowed image formats are JPG, PNG, and BMP. Logos should be square and dimensions should be 120*120 pixels for the best results. The file size must not exceed 1 MB.

- Developer contact information
- Email addresses: Enter the same email address as provided in the User support email field in the App Information section.
- App Information
- Click SAVE AND CONTINUE.
- Click ADD OR REMOVE SCOPES.
- On the Manually add scopes, enter
https://mail.google.com/. - Click ADD TO TABLE.
- Ensure that the checkbox of the scope that you added is selected.
- Click UPDATE > SAVE AND CONTINUE.
- Click ADD USERS.
- Enter the same email ID you provided in the OAuth consent screen page.
- Click Add > SAVE AND CONTINUE.
- On the left sidebar, click Credentials.
- Click CREATE CREDENTIALS > OAuth client ID.
- From the Application type dropdown menu, select Web application to create an OAuth client ID and client secret.
- Name: Enter the application name.
- Authorized redirect URIs: Click + ADD URI to add the redirect URI. Enter the following URI:
https://localhost:8284/networking/rest/token.
- Click CREATE.
- The Client ID and Client secret values are generated.


Note: Copy the Client ID and Client secret values, and paste them into respective fields on the AgileApps OAuth configuration page.
Using Microsoft Outlook as your Mail Server
Before you configure your mailbox settings on AgileApps Client, perform the following steps to register your application in the Microsoft Mail Server.
Registering your Application in the Microsoft Mail Server
Prerequistes:
- Ensure that the user has the required license to access the external Mailbox, that is Microsoft Outlook. For example:
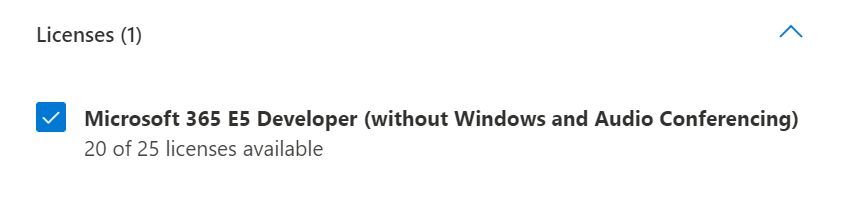
- Go to https://admin.microsoft.com > Users > Active users page. Search for the user in the list and select the checkbox to see information about the user.
- Provide the license information in the Licenses and apps tab. Ensure that the IMAP and POP protocols are not in the blocked state and you must have only the Other email apps allowed text displayed in the Mail > Email apps section. The user for whom you have updated the license information is allowed to access the mailbox.

- Ensure that the user has the required license to access the external Mailbox, that is Microsoft Outlook. For example:


-
Note:
After you perform the steps mentioned in the Prerequisites section, you must wait for a minimum of 30 minutes for the changes to get synchronized and reflected.
You must register your application in the Microsoft Mail Server as an OAuth Client. You must create a project prior to performing the application registration process.
- Go to the Microsoft Azure portal and sign in with your credentials.
- Under Azure Active Directory, go to the App registrations page and click + New registration tab. Enter the following details and click Register.
- Name: Enter your application name.
- Supported account types: Select Accounts in any organizational directory (Any Azure AD directory – Multitenant) and personal Microsoft accounts (e.g. Skype, Xbox) option.
- Redirect URI: Enter the redirect URI.
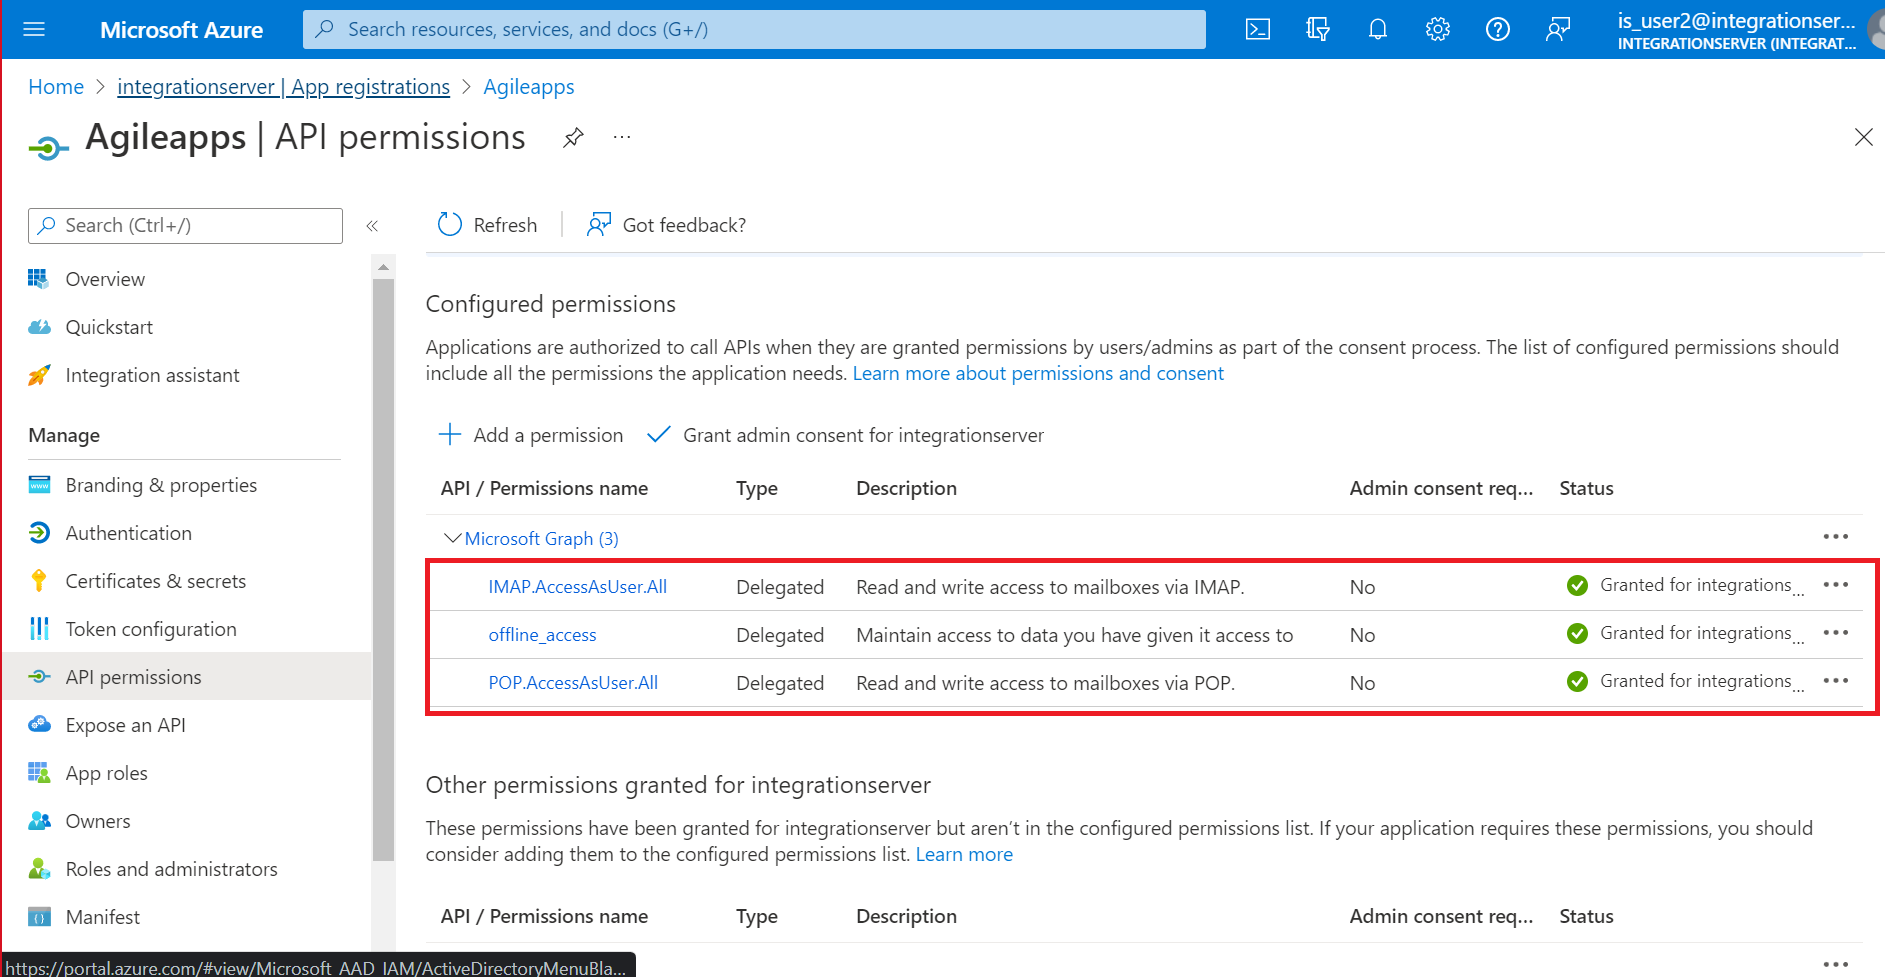
- Under App registrations, go to the API permissions page and click + Add a permission. Select the following permissions:
- IMAP.AccessAsUser.All
- Offline_access
- POP.AccessAsUser.All
- Note:
- To get the refresh token that can be used to renew the access token, you must include Offline_access scope.
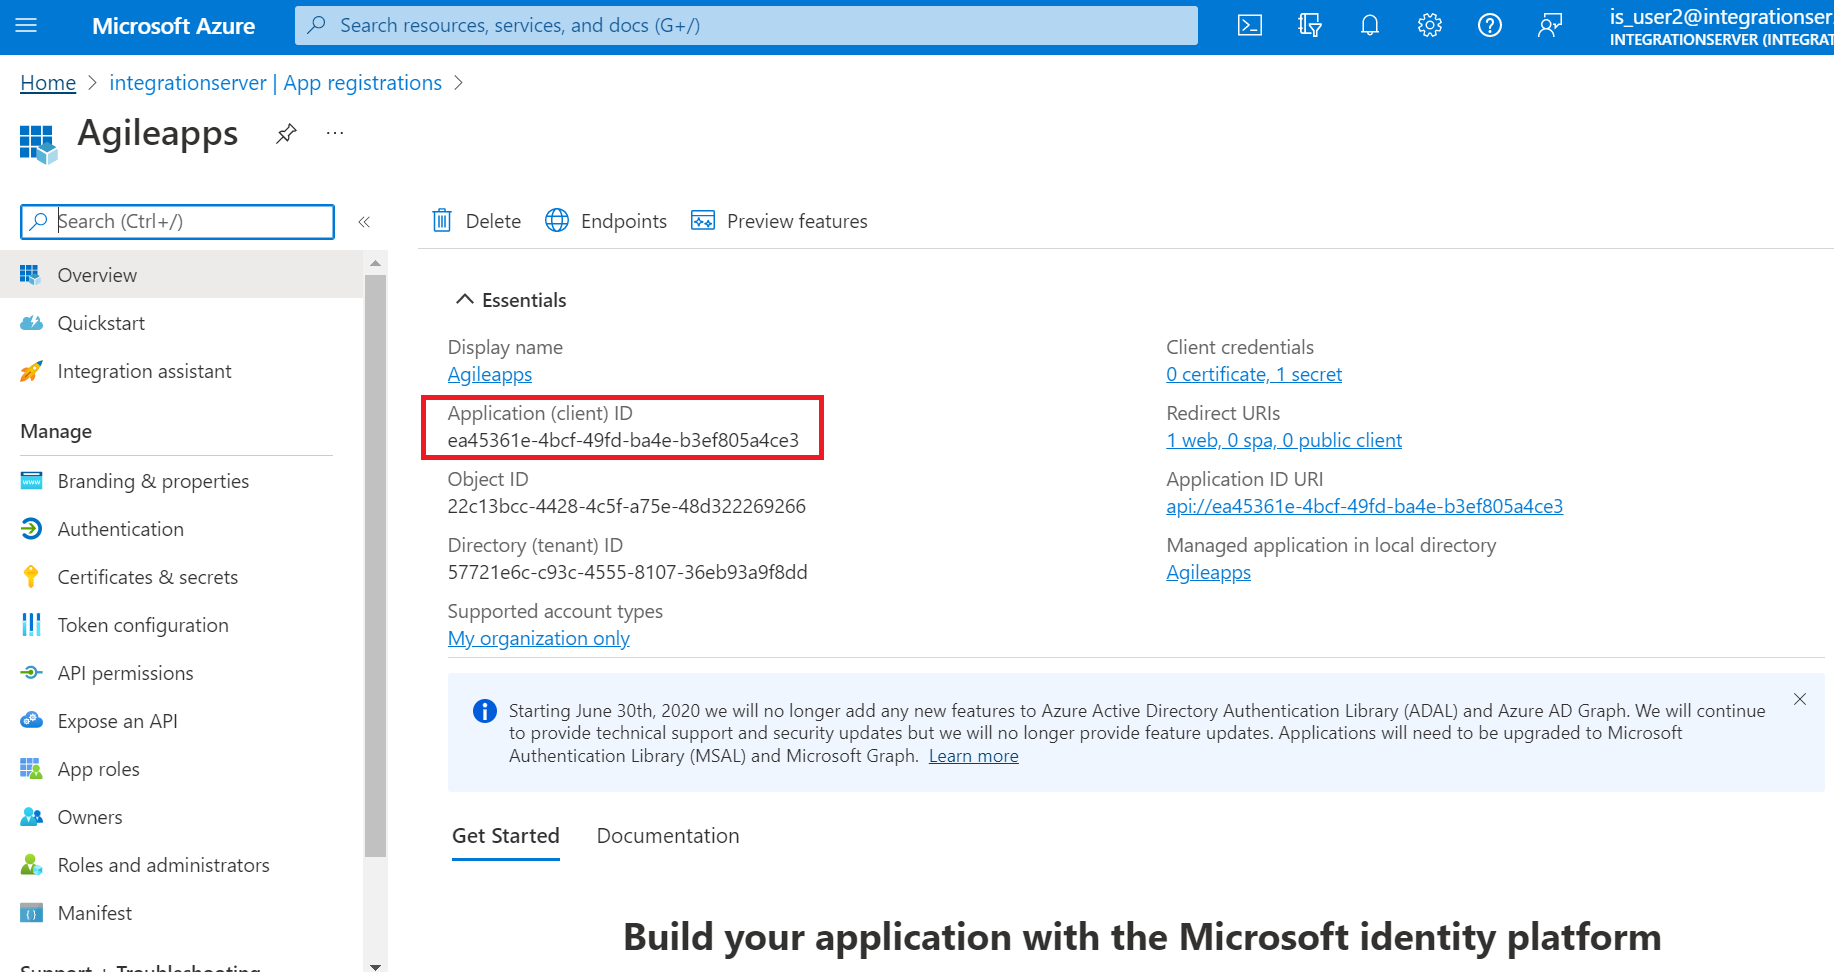
- To locate the Client ID, perform the following steps:
- Under Azure Active Directory > integrationserver > App registrations > Overview window, you will see all the information about the application you have registered.
- You must copy the Application (client) ID and paste it into the Client ID textbox of the AgileApps Client Mailbox settings.
- Under App registrations, go to the Certificates & secrets > Client secrets tab and click + New client secret. Enter the description and expiry date and click Save. You must copy the Value that is generated and paste it into the Client Secret textbox on the AgileApps Client mailbox settings page.
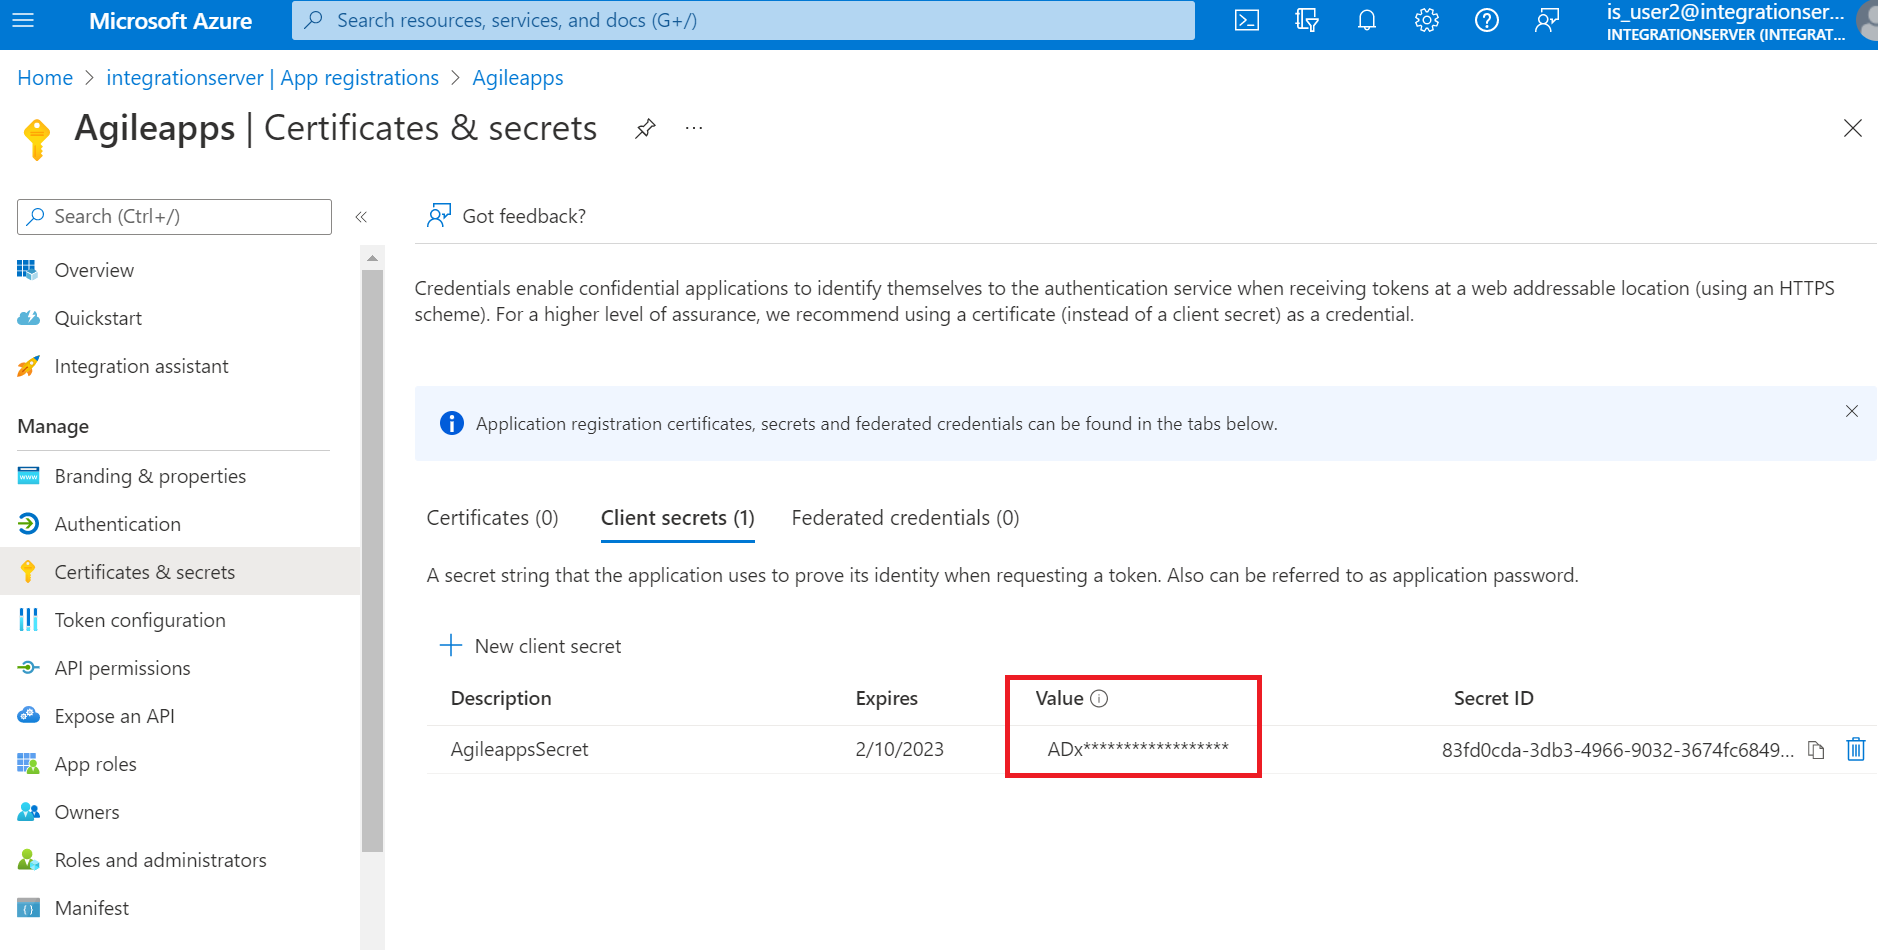
- Note:
- Do not copy the Secret ID. It is the Value you must copy and paste into the Client Secret textbox.
- The value appears once when you register the application. Copy it immediately, after which it gets hidden.
- Note:
- To see the Auth URL and Access Token URL, perform the following steps:
- Under the Azure Active Directory > integrationserver > App registrations > Overview window, click the Endpoints tab.
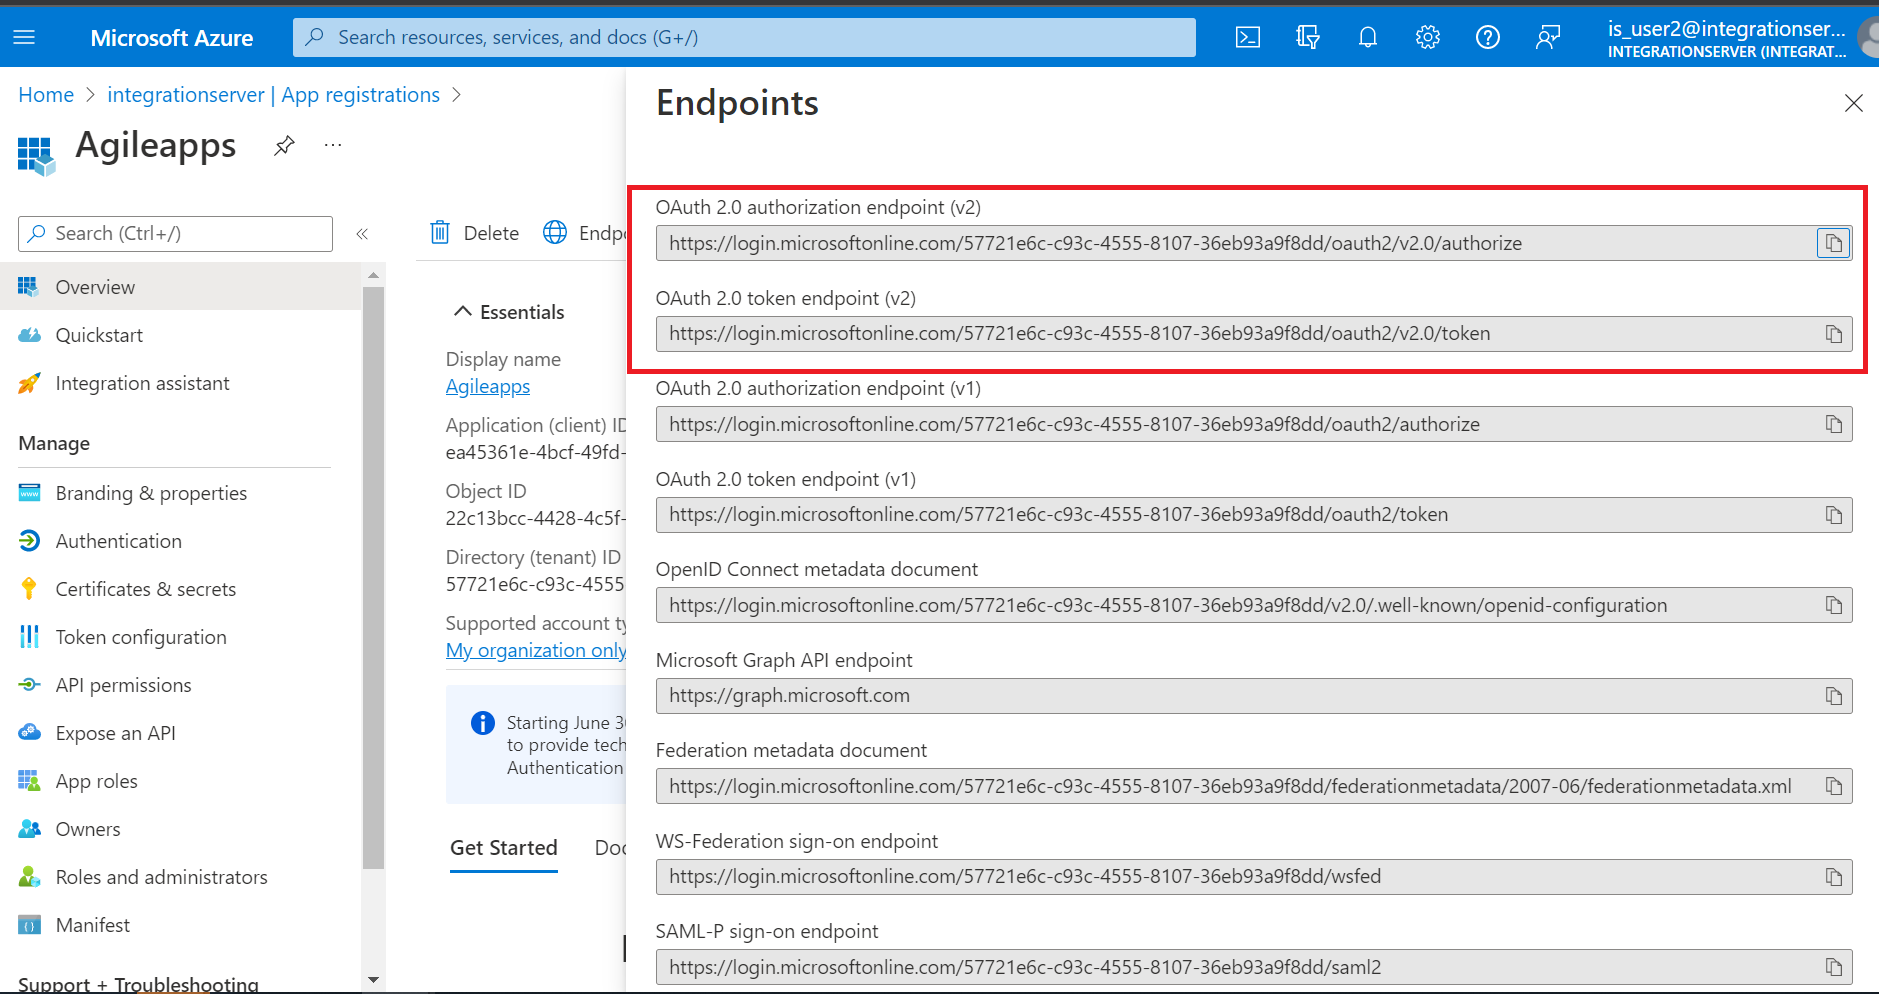
- Copy the OAuth 2.0 authorization endpoint (v2) and paste it into the Auth URL textbox of the AgileApps Client – New Mailbox page.
- Copy the OAuth 2.0 token endpoint (v2) and paste it into the Access Token URL textbox of the AgileApps Client – New Mailbox page.
- Under the Azure Active Directory > integrationserver > App registrations > Overview window, click the Endpoints tab.


