Multiple files attachment in a record for new user interface
From AgileApps Support Wiki
This feature enables you to upload or download multiple files to record attachments. Prior to this implementation, you could upload only one file at a time to record attachments using the file uploader dialog and download the file by clicking on the attachment file items listed in the right-side panel.


Note: This applies only to the record's attachment and not to the file or image field.
Design
- When you click on the Attachment icon on the right side of the bar, the files attached are visible with the Upload and Download icons.

- Multiple files can be downloaded using
 icon.
icon.
- Multiple files can be downloaded using
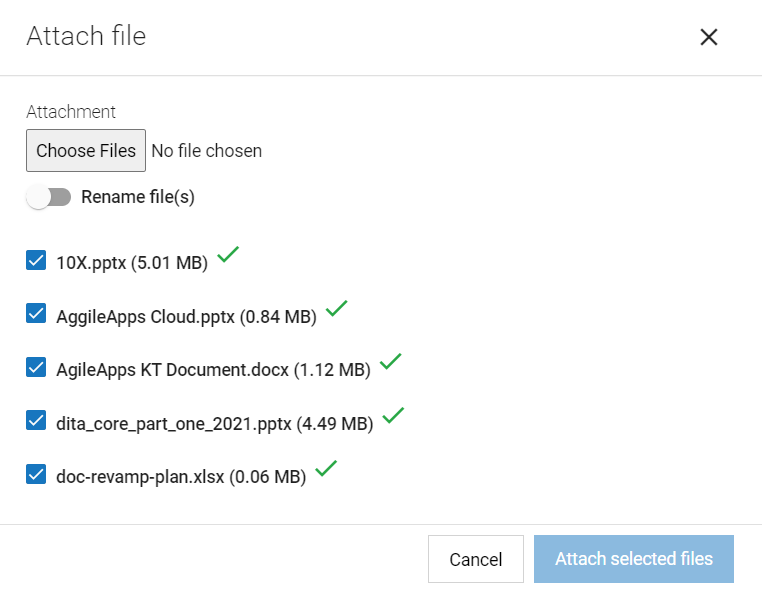
- When you click on the upload icon Attach file uploader dialog appears. Then click on Choose Files, select the desired files, and click on the Attach selected files button to attach the files.

- When you select more than 5 files, the file uploader dialog error message appears You can upload up to 5 files at a time.

- After you uncheck the excess files and the selection reaches 5 files, all the 5 files can be uploaded by using the Attach selected files button.

- If a file is not uploaded due to file size (limit is 20MB or asper system configuration) or type of file, an inline error message will be displayed. You can uncheck all the error files and upload the remaining files again using the Attach selected files button.

-
Note: The default file size validation for attachment across all tenants is 20 MB. Changing this configuration for cloud tenants might affect the data and document usage charges. For On-Prem customers, this is a straightforward change as it is on the customer's infrastructure. To change this to 10MB follow the below steps.
- System Configuration
- Open {install-dir}/profiles/IS_default/configuration/tomcat/conf/RN/networking.properties
- Add attachmentsFileSizeMaxLimit=10000 (Units in KB)
- Save the file
- Restart the Application Server
- When a file is uploaded it will have a green tick mark
 next to the file uploaded.
- When a file is uploaded it will have a green tick mark
 .
.

- Once all files are uploaded they will appear in the attachment list on the right panel.

Download or Delete Individual files
- When you click on 3 dots next to the attached file, Download and Delete options are available.

View Individual file
- To view a file, click on the file name, The file now appears in the dialog box if you have office 365 installed. If not, the file gets downloaded.