Private Notes and Email Messages
From AgileApps Support Wiki
Revision as of 06:11, 17 August 2016 by imported>Aeric (→Creating a Private Note or Email Message)
About Private Notes and Email Messages
Private Notes and Email messages can be created when viewing a a Case record or some other record. They are stored in the record history, displayed underneath the record. The difference is:
- A Private Note doesn't cause an email to be sent to anyone.
- When internal users (normal Users who log into the platform) view a record, they can see all email messages and notes recorded in the history. (Their privileges and team memberships may or may not allow them to see the record. But if they can see it, they have access to its entire history.)
- For the Cases object, email responses are stored in the history, as well as sent messages.
- For other objects, only sent messages are recorded.
- When external users (those accessing records using the Service Portal) view a record, they see only those messages in the record history in which they were the sender or a recipient.
Working with Private Notes and Email Messages
Creating a Private Note or Email Message
- Under the record information, click in the area that says Reply or Add a Note
The area expands, and several additional buttons appear. - Click [Private Note] to add an entry to the record history
- Or click [Email] and select message recipients.
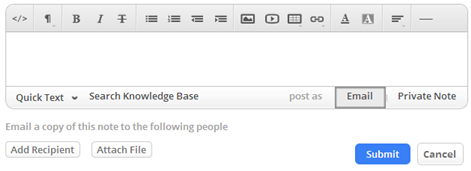
The message is added to the record history, the same as a note. - For a Case record in ServiceDesk, the following form appears:

- Quick Text - Insert a segment of Quick Text into the message.
- Search Knowledge Base - If a Knowledge Base is present, use this option to insert a link to an article.
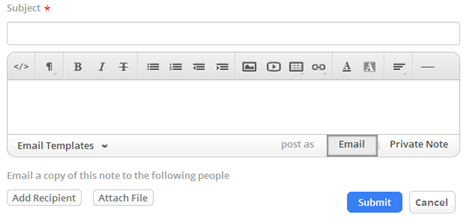
- For all other object records in Service Desk or in Dynamic Case Management applications, this form appears:

- Email Template - Select an optional Email Template to use for the message.
- For all records, you can also:
- [Add Recipient] - Click this button to add additional message recipients for an email.
- [Attach File] - Click this button to add an Attachment.
- Click [Submit]
- For Case record inside a DCM application only Search Knowledge Base is displayed.