Difference between revisions of "Macros"
From AgileApps Support Wiki
imported>Aeric |
imported>Aeric |
||
| Line 24: | Line 24: | ||
#: | #: | ||
# The two actions defined for this macro are to set the Case status, and to send an email. | # The two actions defined for this macro are to set the Case status, and to send an email. | ||
When you choose the email option, you are then prompted to select specify the template to use, and who to send it to. (In this case, you're sending to the '''From Address''' -- the address of the person who reported the case.) | #: When you choose the email option, you are then prompted to select specify the template to use, and who to send it to. (In this case, you're sending to the '''From Address''' -- the address of the person who reported the case.) | ||
#: | #: | ||
#When you're done, click '''[Save]'''. | # When you're done, click '''[Save]'''. | ||
#: The macro now appears in the Action list when the specified conditions are satisfied. | #: The macro now appears in the Action list when the specified conditions are satisfied. | ||
<noinclude> | <noinclude> | ||
Revision as of 01:52, 15 May 2013
![]() > Case Automation > Macros
> Case Automation > Macros
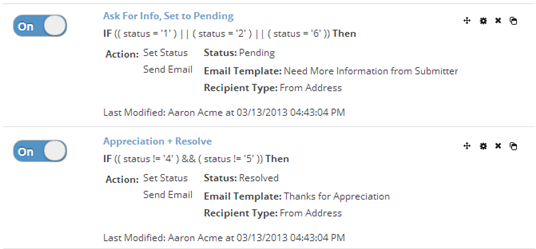
Macros appear in the list of actions that are available when working on a case. Selecting one causes multiple actions to be performed. Here, you see one of the default macros that comes with the system--one that marks a case as Resolved and sends a note of appreciation for the report:

To work with macros:
- Go to
 > Case Automation > Macros
- A list of existing macros appears, showing the actions that are taken when each macro is selected.
- To enable or disable a macro, click the button that appears next to it:
- To create a macro, click [New Macro].
- To edit a macro, click either the macro name or the gear icon.
- You can also click items in the icon list to change the order of the macro in the list, delete it, or clone it.
(Hovering over the icons shows you which is which.) - Each macro has a name, a list of conditions under which it is available, and a list of actions it performs when selected, all specified in the edit window:
- The two actions defined for this macro are to set the Case status, and to send an email.
- When you choose the email option, you are then prompted to select specify the template to use, and who to send it to. (In this case, you're sending to the From Address -- the address of the person who reported the case.)
- When you're done, click [Save].
- The macro now appears in the Action list when the specified conditions are satisfied.


